Video tutorial on how to create a free chatbot for Fanpage, Zalo and website very simply
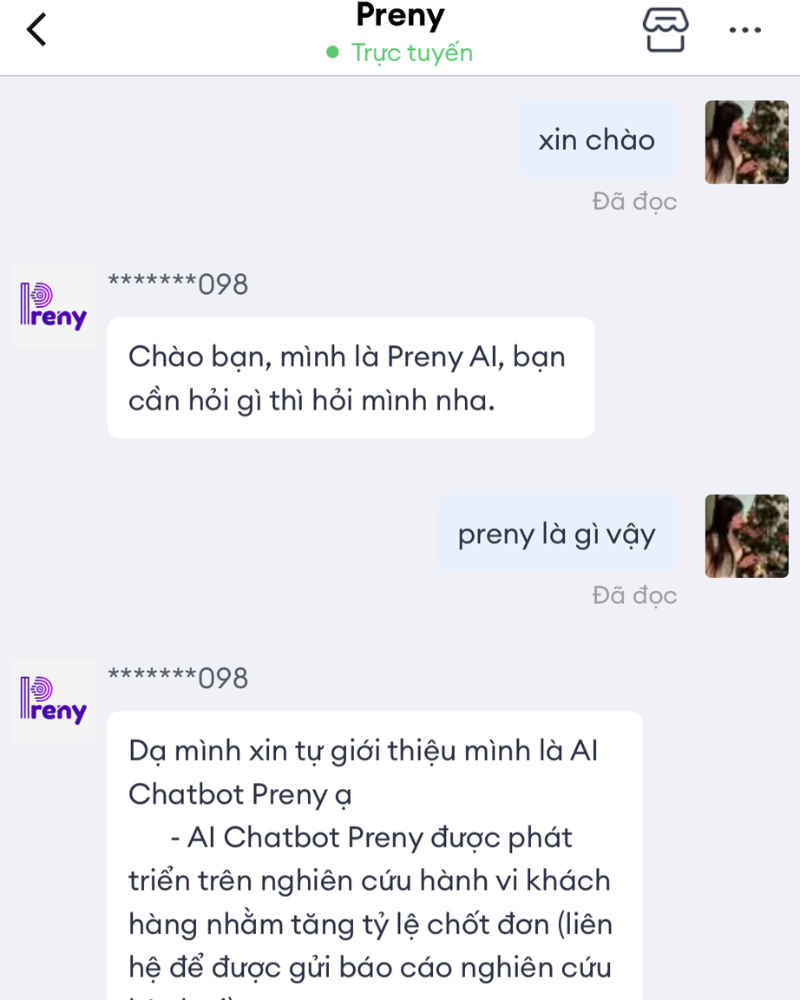
How to register a free chatbot account
To use AI chatbot for free, you need a Preny account. Here's how to sign up for a free chatbot account.
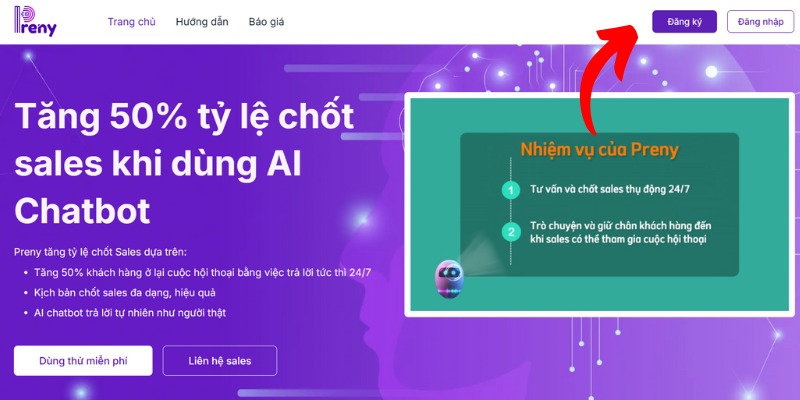
1. Log in to Preny.ai
Click on the AI chatbot account registration button to create a free chatbot.
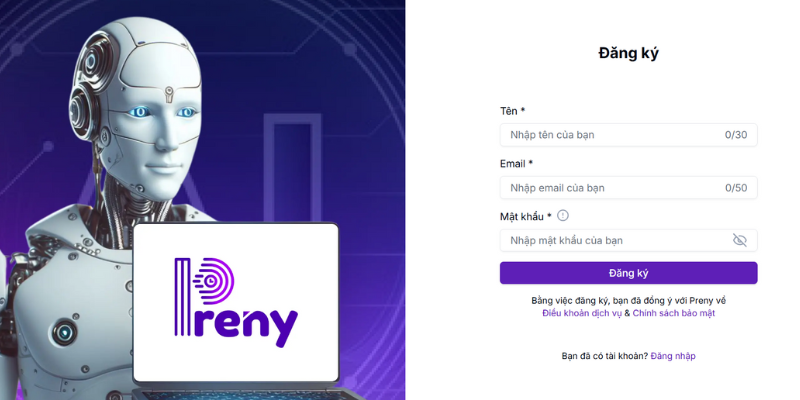
2. Fill in account information
Fill in your information to register for a free chatbot account
3. Enter OTP code and verify account
Enter the OTP code sent to your email

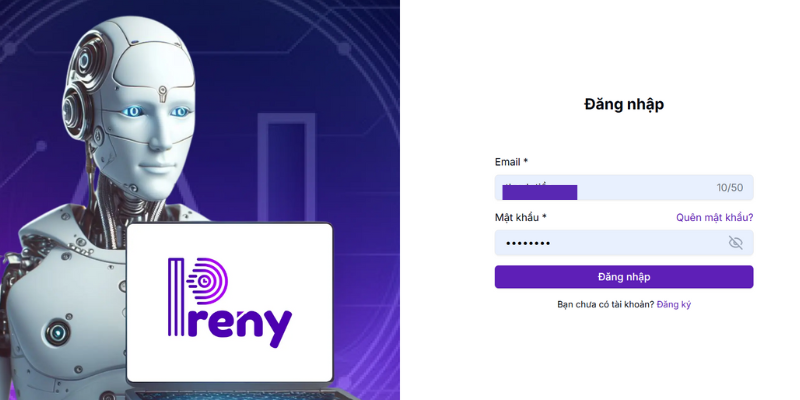
Log in to the chatbot account you just created
So you have a Preny account, now you can integrate chatbot and use it for free for 7 days with 2000 accesses. You can see the integration tutorials on Facebook, Zalo and website platforms to create your own free chatbot.
Free chatbot training
Create a free chatbot
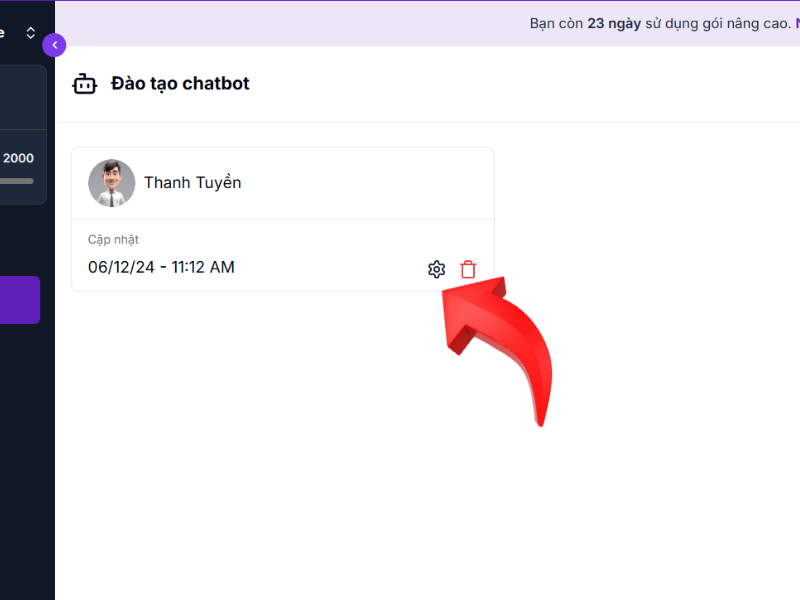
After logging into your AI Preny chatbot account, you will be redirected to the admin page. Select Train chatbot and Create chatbot.
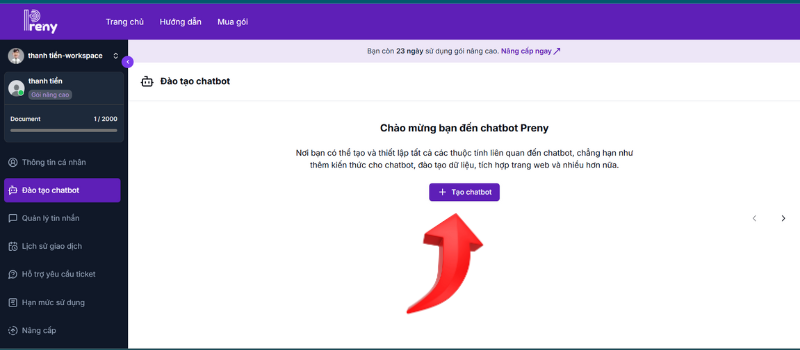
After selecting Create chatbot, follow these steps to create a free chatbot:
Step 1: Name the chatbot and choose a chatbot avatar.
Step 2: Set a default greeting for the chatbot.
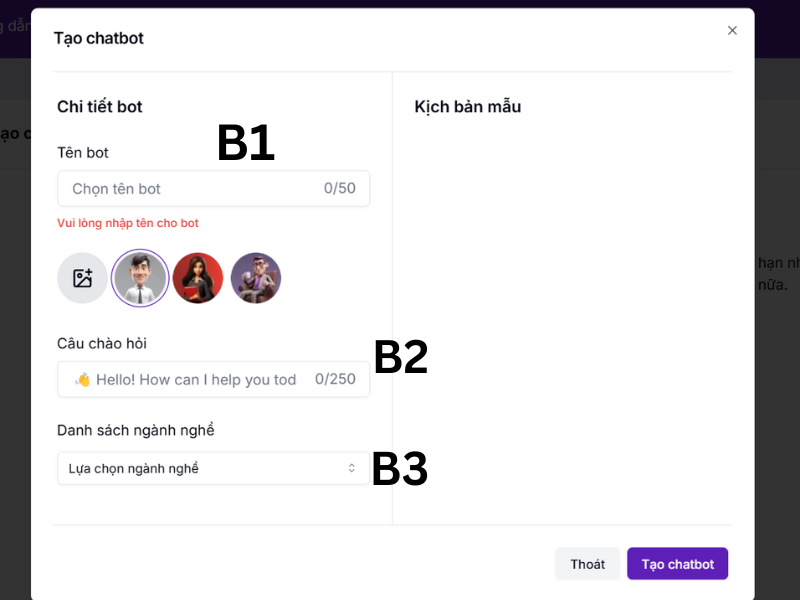
Step 3: Select the business line of the platform you want to integrate the free chatbot.

Step 4: On the right side, sample chatbot scenarios that Preny suggests appear. You can choose the scenarios that suit your chatbot integration intentions.
Step 5: Click Create chatbot.

After creating the chatbot, the screen will display the chatbot frame as shown, click the Install button to set up the chatbot.
Set up chatbot
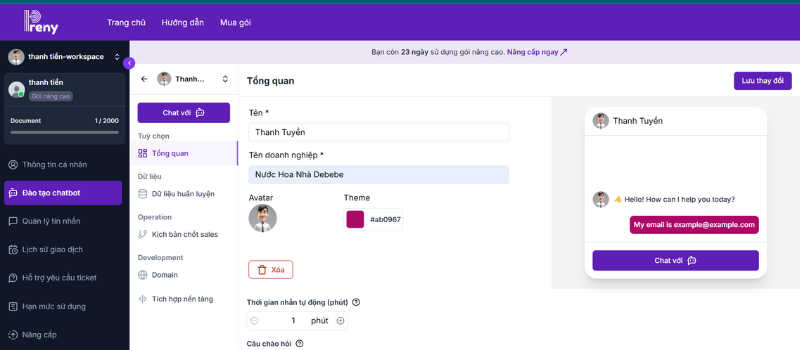
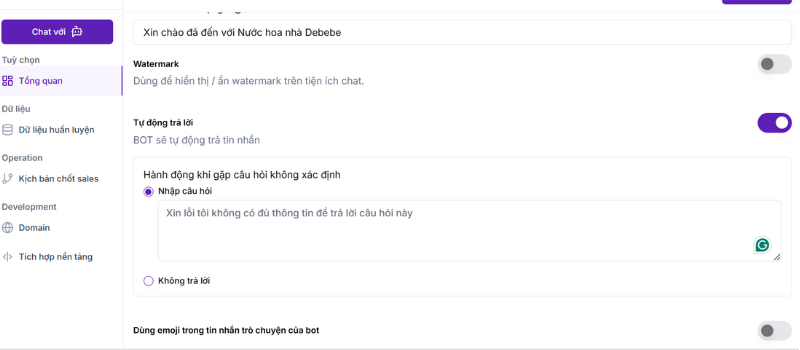
Fill in your business name and customize the chatbot color to your liking
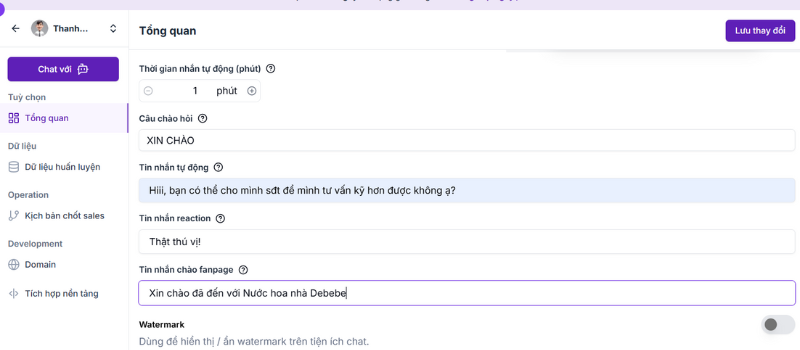
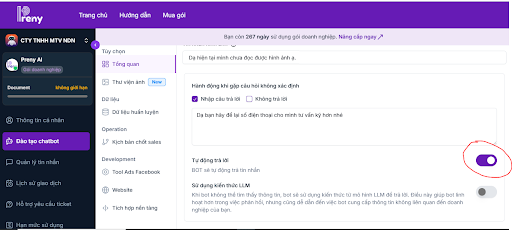
Adjust response times and automated responses for your chatbot
If you want the chatbot to automatically reply to messages when encountering an unknown question, click the button to open the Auto-reply feature to answer questions that do not have information available on the website/fanpage or in the chatbot script.
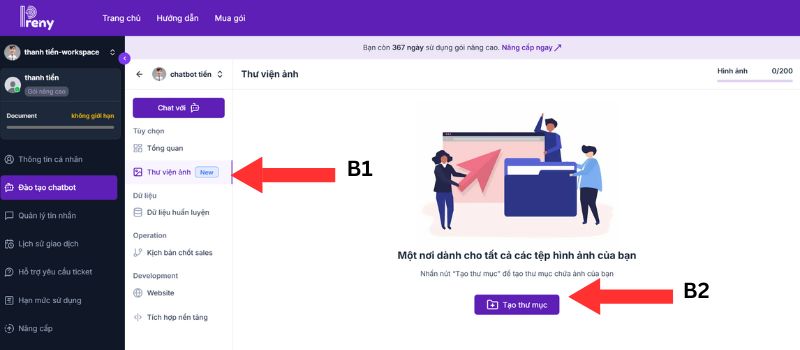
Photo Gallery
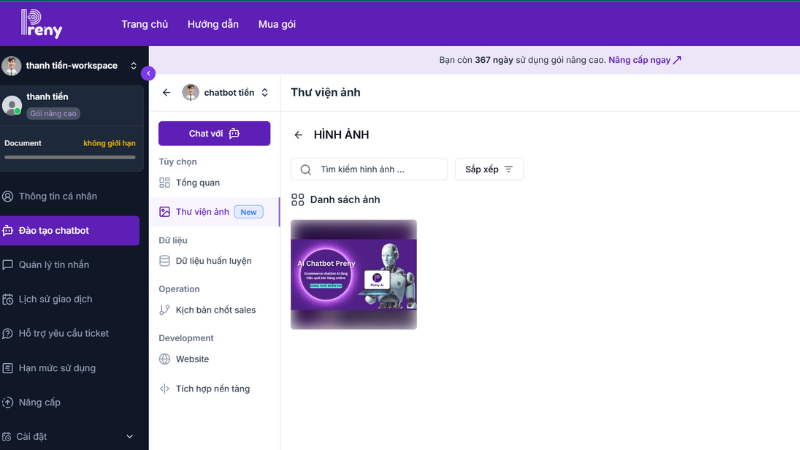
AI chatbot Preny has an image reply feature to increase the ability to close deals. The photo library is for you to provide a product image repository for AI chatbot Preny to reply to customers.
You select Photo Library and select Create Folder.
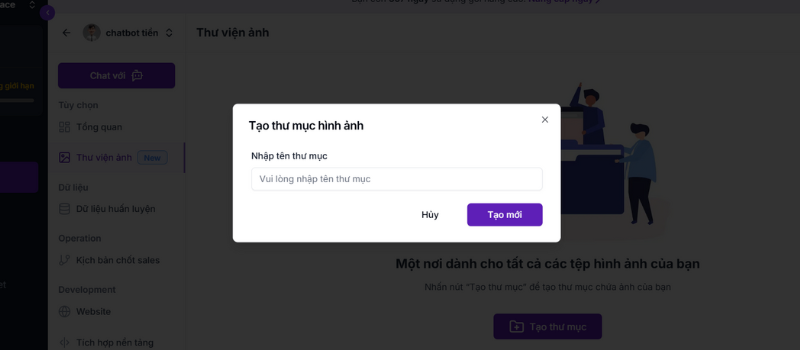
Next Name the folder and select Create new.
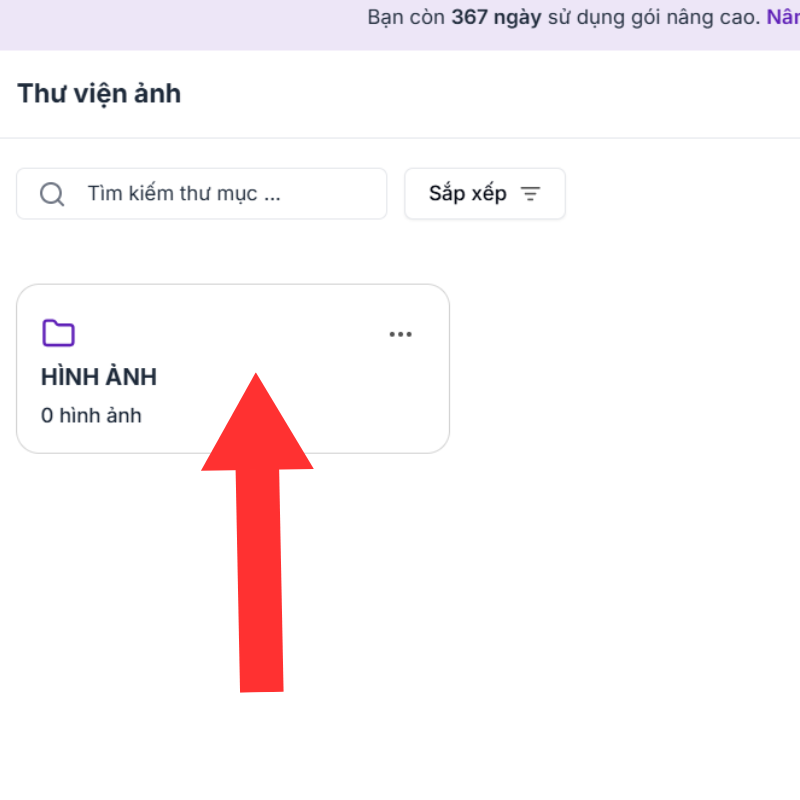
Click on the folder you just created to upload the image.
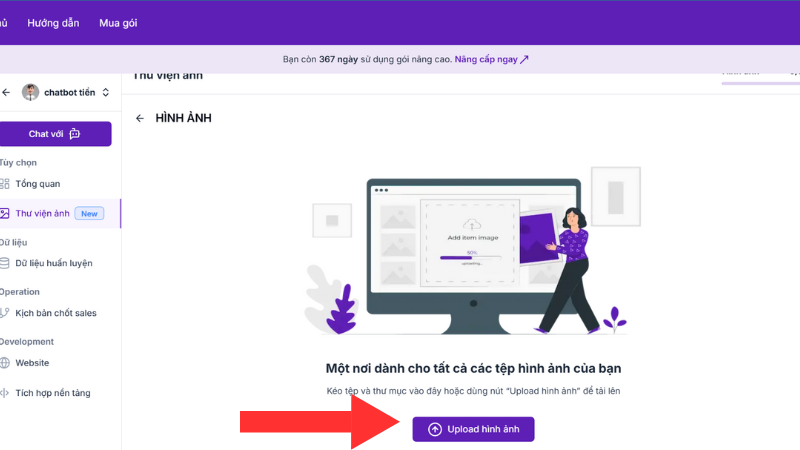
Select the photo you want the chatbot to respond to.
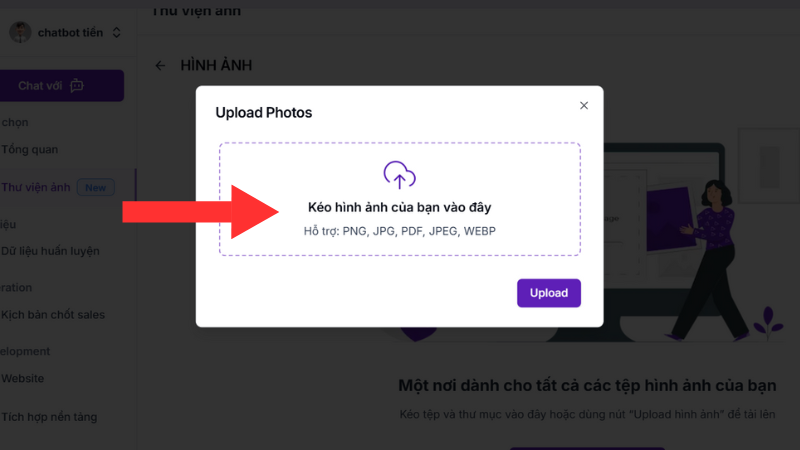
Click on the folder you just created to upload the image.

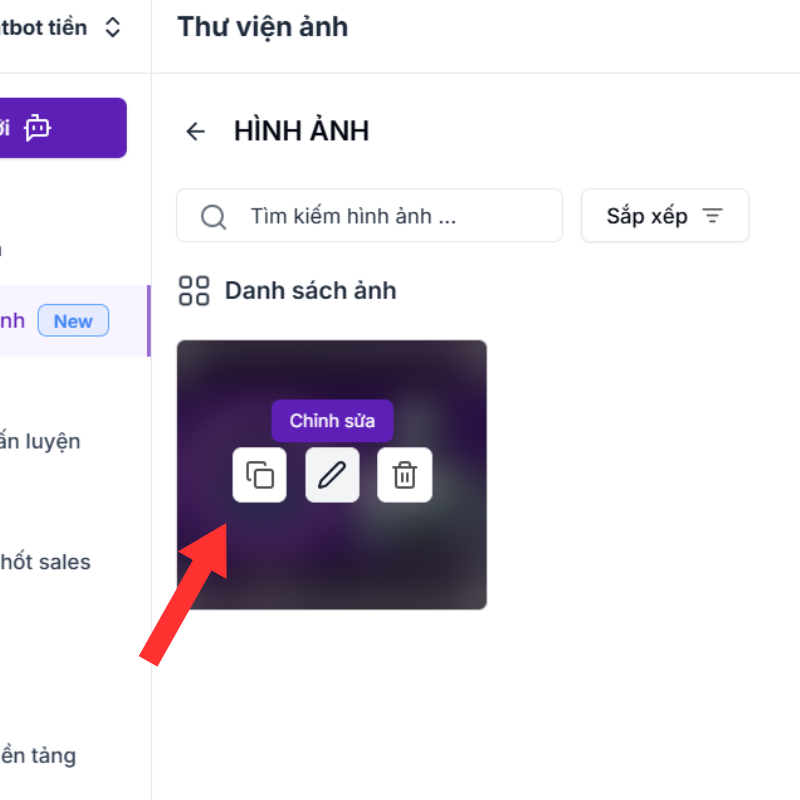
After adding the image, click the Copy image link button to paste the image link into the Training Data or Sales Closing Scenario section.
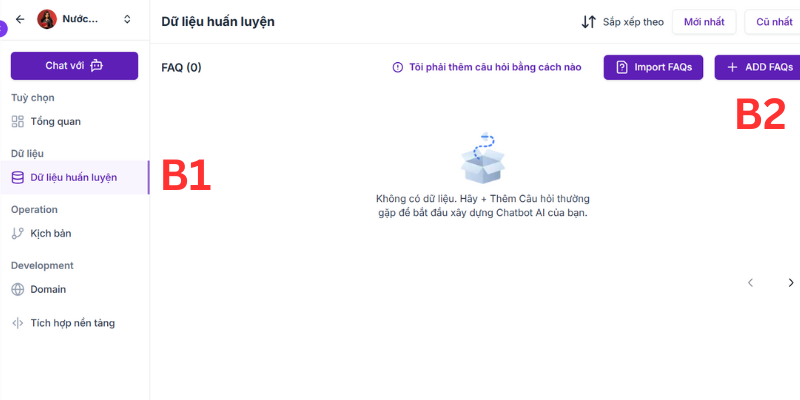
Add chatbot training data
In the Training Data section, you can add questions to train the chatbot. Click the Add FAQs button to add questions.
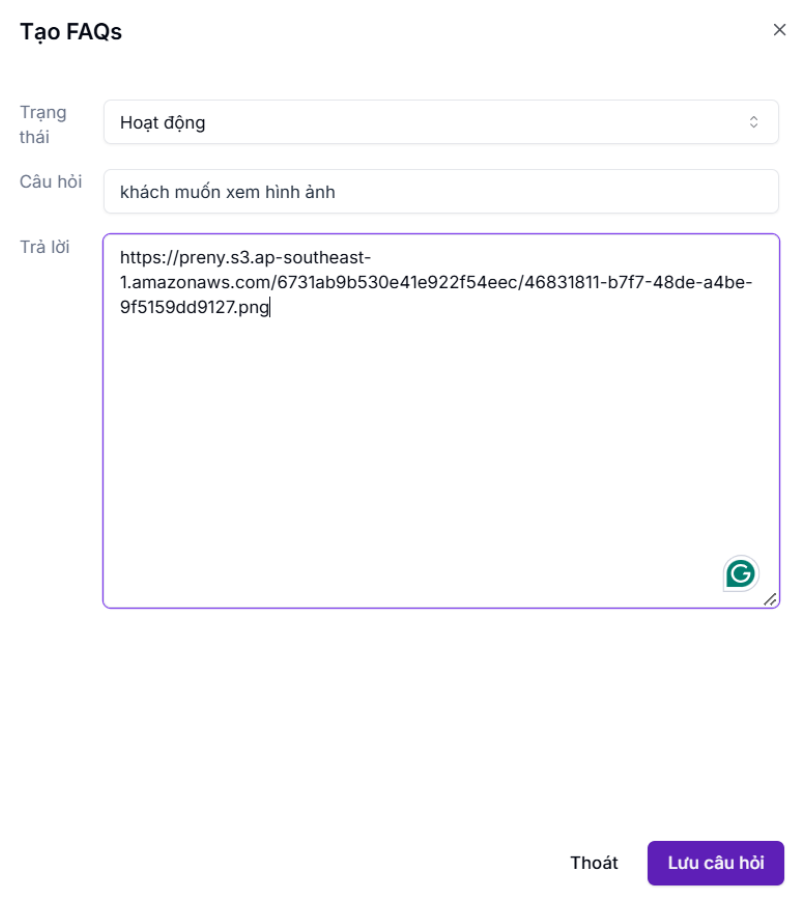
Fill in the default question and answer for the AI chatbot, then click save question. If you want to add as many questions as you want, click Add FAQs as many times. If you want the AI chatbot to answer with images, paste the image link into the Answer field as shown below.
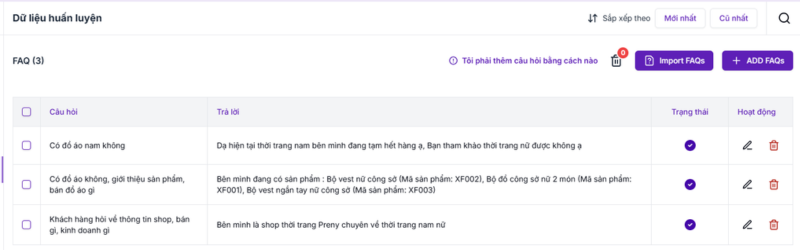
Once you add a question and a default answer, the chatbot will use it immediately. You can edit the question or delete it if you want.
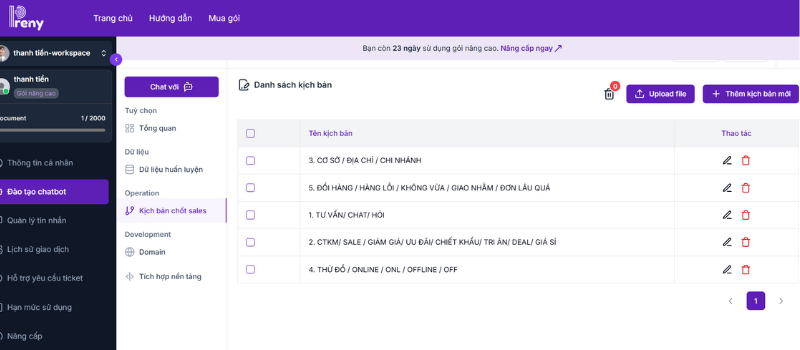
Create a chatbot script to close sales
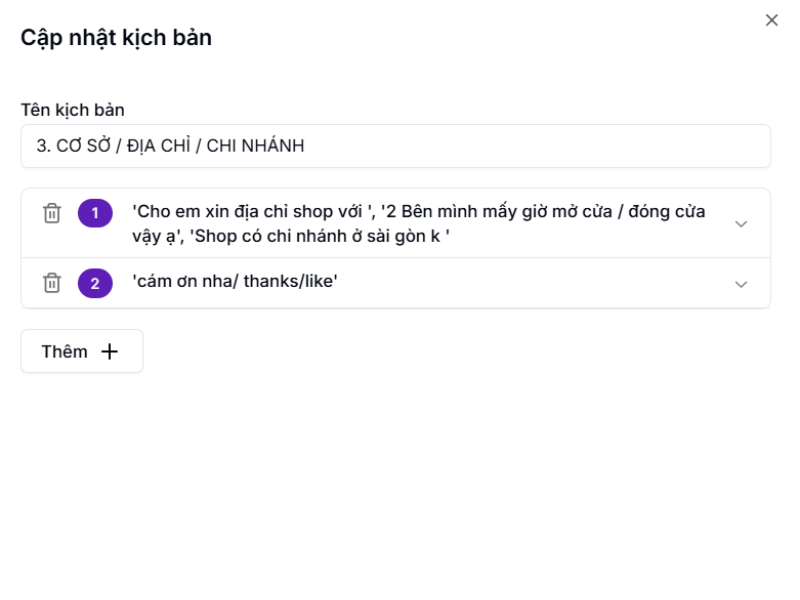
In the Sales Closing Scripts section, you can see the sample scripts you selected earlier appear here. If you want to adjust the sample script, click on the Pen icon, or delete the sample script in the Trash icon.
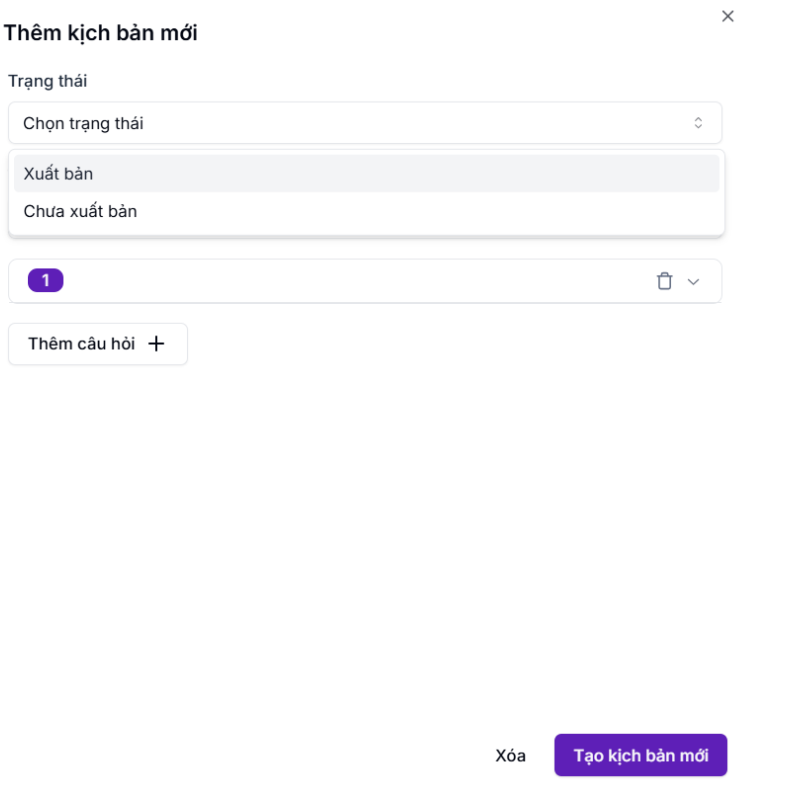
If you don't want to use the sample scenario, you can click the Add New Scenario button to add your own scenario.
A sample Preny script will look like this, you can update your chatbot script by clicking the Add button.
You add text responses or image links in the Photo Library section for AI chatbot Preny to respond to customers.
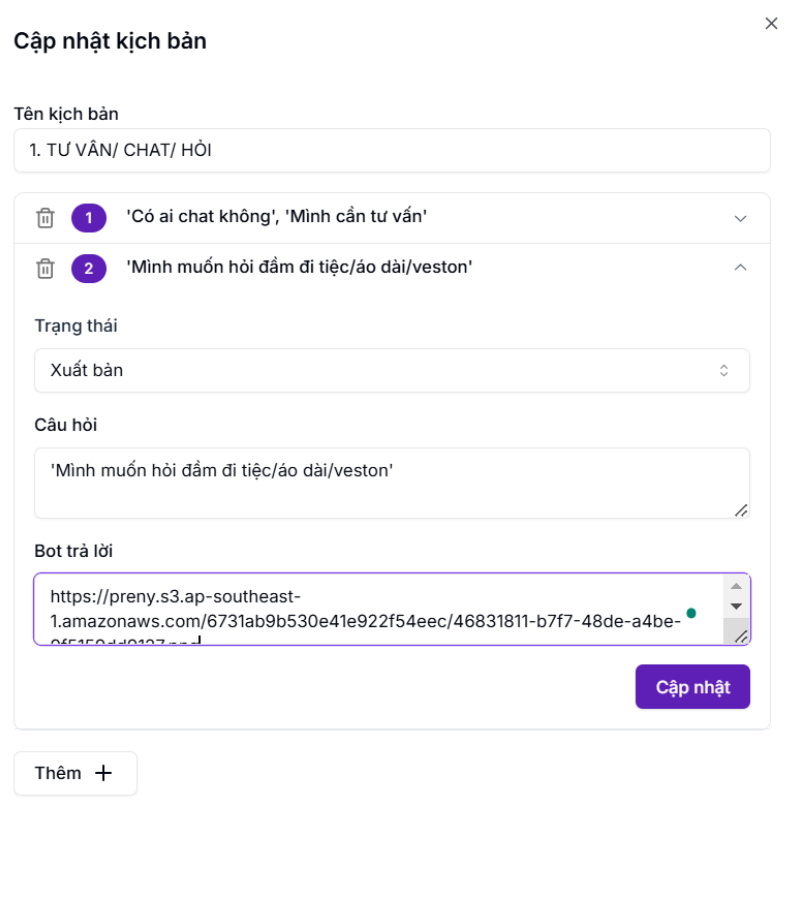
When adding a new scenario, select the Status as Published.
How to Integrate AI Chatbot Preny Cross-Platform
How to create a free Facebook Fanpage chatbot with Preny
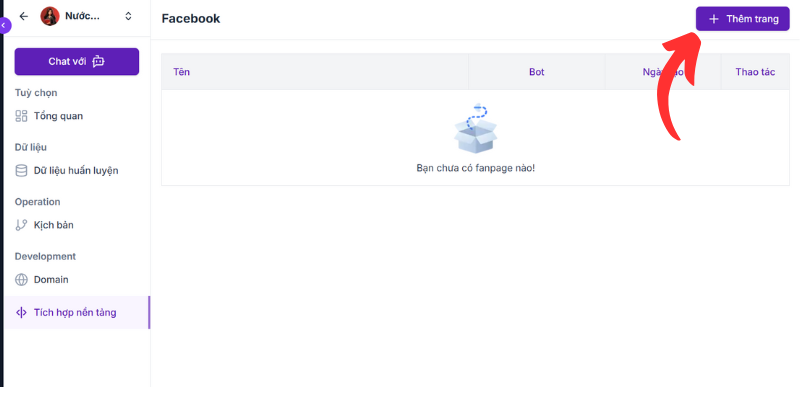
To create a Facebook fanpage chatbot, select Platform Integration and select Facebook to link the Fanpage.

Click the Add Page button to link your sales Fanpage.
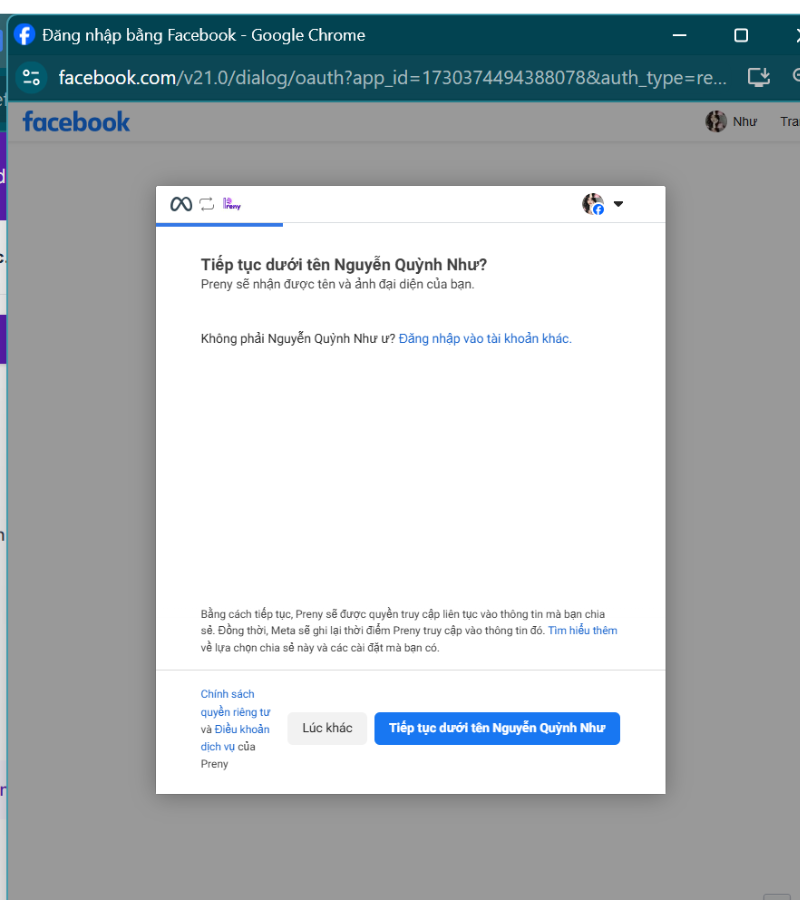
Click Continue to link chatbot to Fanpage
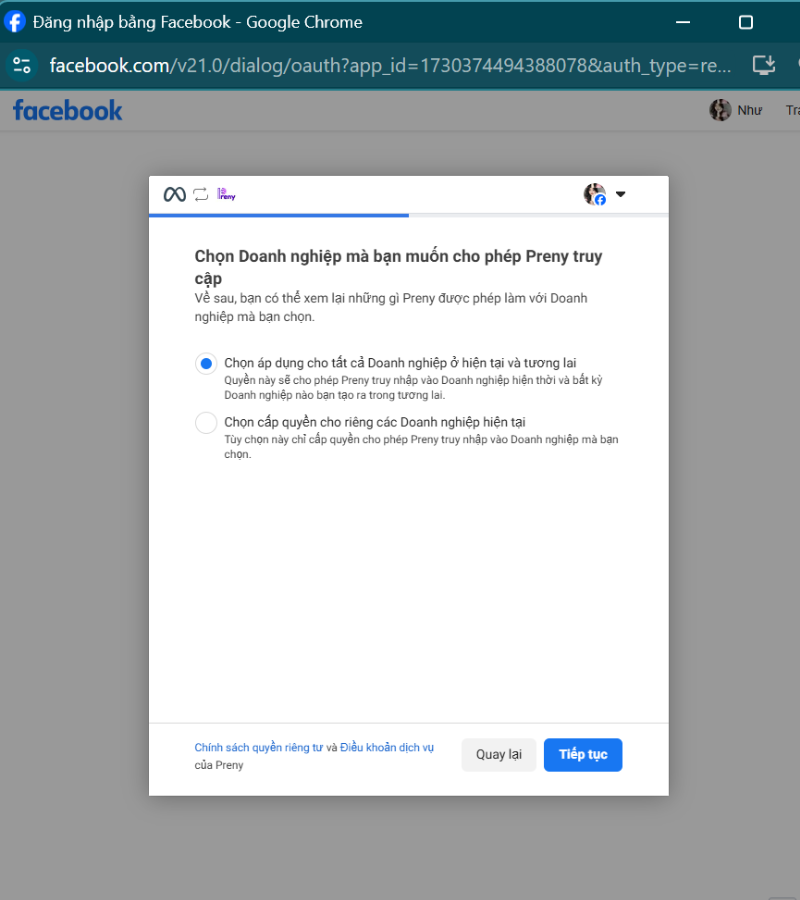
Grant Enterprise access to AI chatbot Preny.
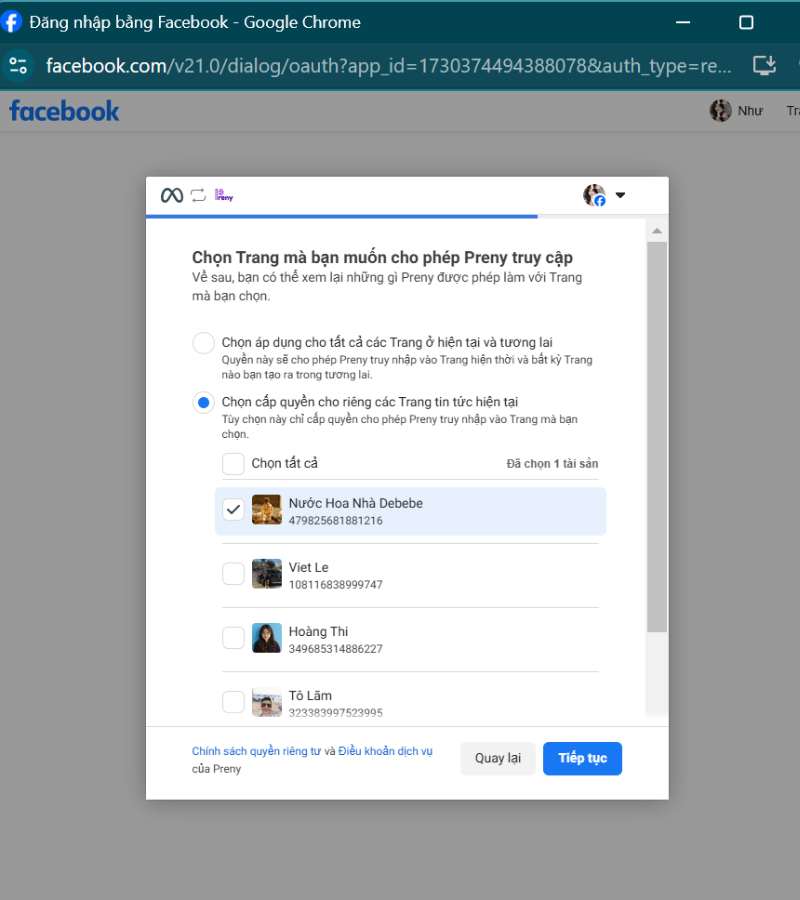
Select the Fanpage you want to create a free chatbot for
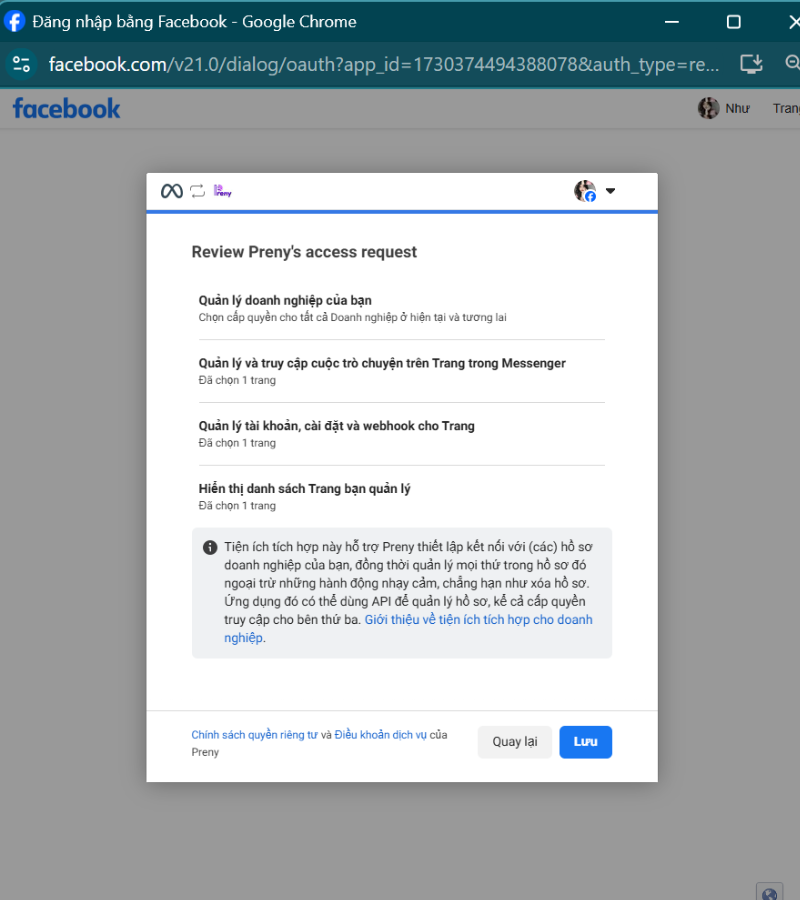
Click Save to authorize the AI chatbot Preny.
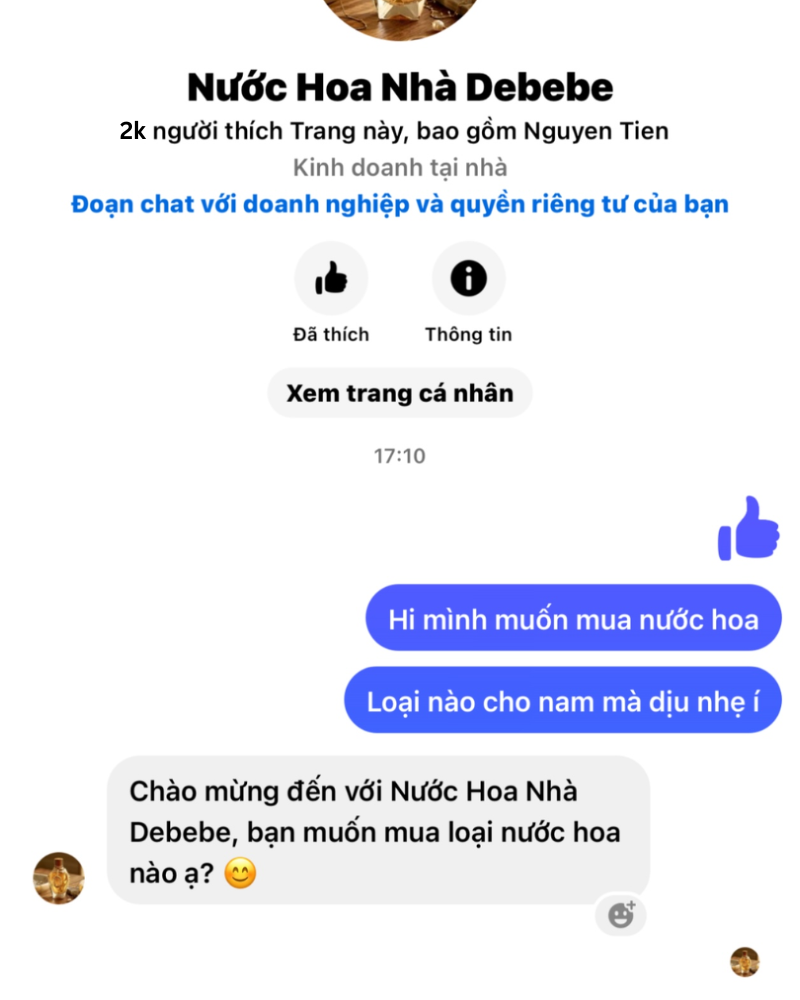
So you have successfully created a chatbot for your Fanpage.
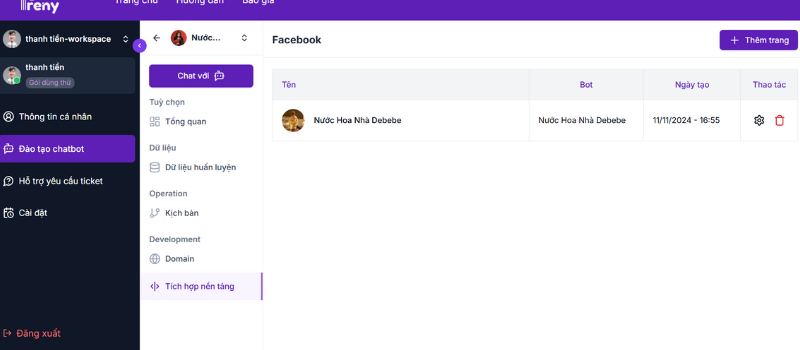
This way of creating a Facebook Fanpage chatbot is extremely simple, it only takes a few minutes. Now you can use Facebook chatbot for free with 2000 accesses, there are also sample scenarios for you to apply. If you need advice on upgrading your service package or advice on creating a sales closing scenario, please contact the Preny team for 1-1 advice.
How to create a chatbot on Zalo for free with Preny
If you are doing business on Zalo, creating a Zalo chatbot is also an effective way to help you increase sales. Preny is the leading AI sales chatbot on the market, with an extremely simple way to create a chatbot on Zalo.
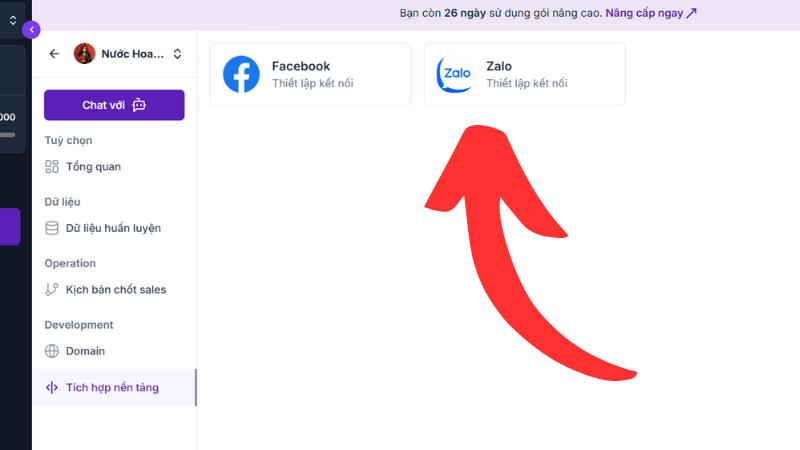
If you want to create a chatbot for Zalo, in the Platform Integration section, select Zalo.
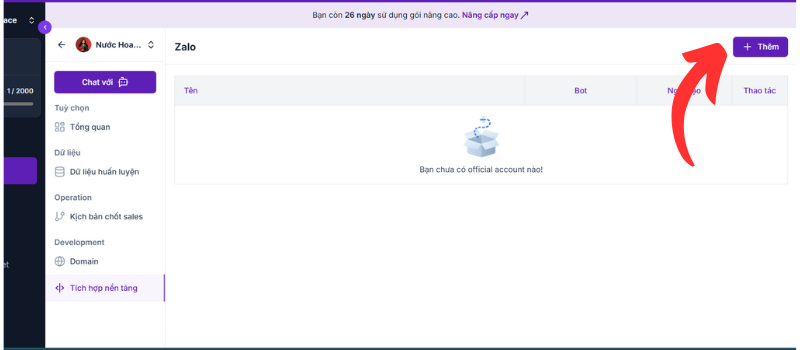
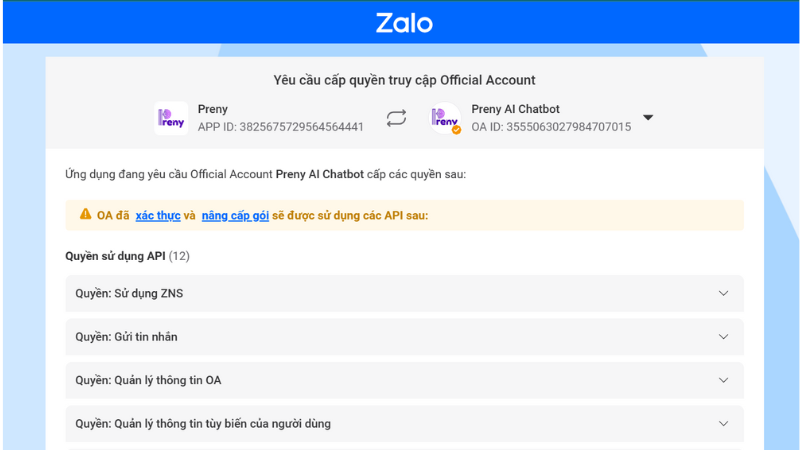
Click the Add button to link to your Zalo OA account
Grant access to Preny with your Zalo OA account

So you know how to create a chatbot on Zalo with Preny AI. Now you can use Zalo chatbot for free with 2000 accesses. Then you can upgrade to a monthly package to increase sales revenue more effectively.
How to integrate chatbot into website with Preny
Creating a chatbot for your website is an effective way to increase online sales quickly. With AI Preny chatbot, integrating a chatbot into your website is also extremely simple.
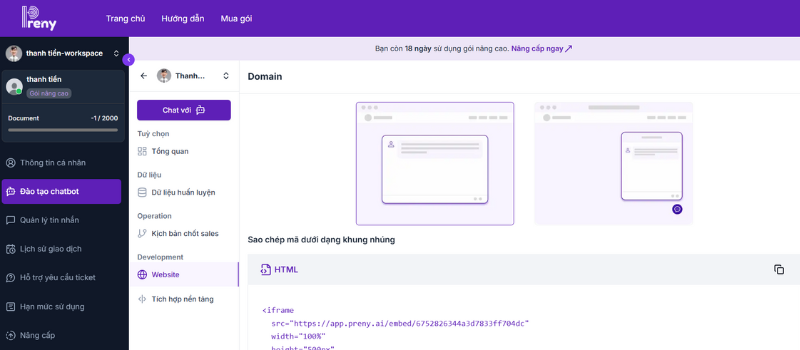
If you want to integrate chatbot into your website then Select Domain, there are 2 ways to create chatbot for website:
Method 1: You copy the code as an embed frame.
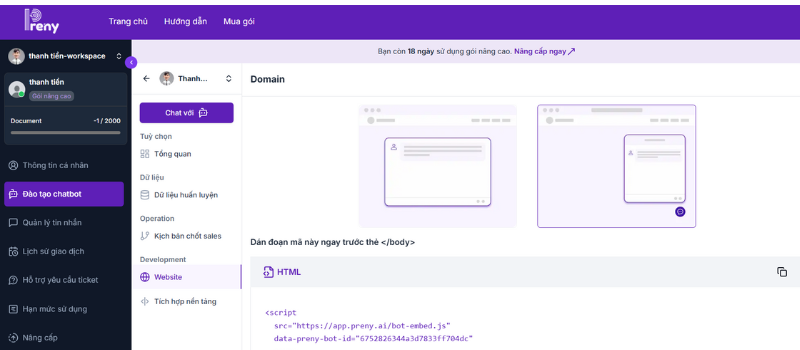
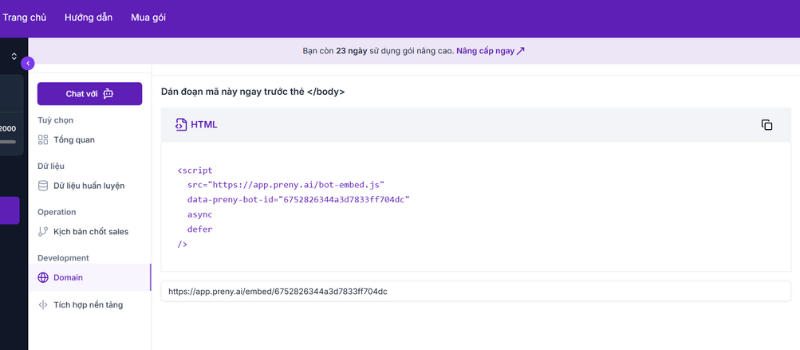
Method 2: Save the available chatbot code. Then access the website's Source code and paste this code into the website's Body tag and you're done.
So now you know how to integrate chatbot into your website. You can use AI Preny chatbot for free for 7 days with 2000 accesses. If you have any questions about upgrading your account or creating effective sales closing scripts, contact the Preny team for 1-1 consultation.
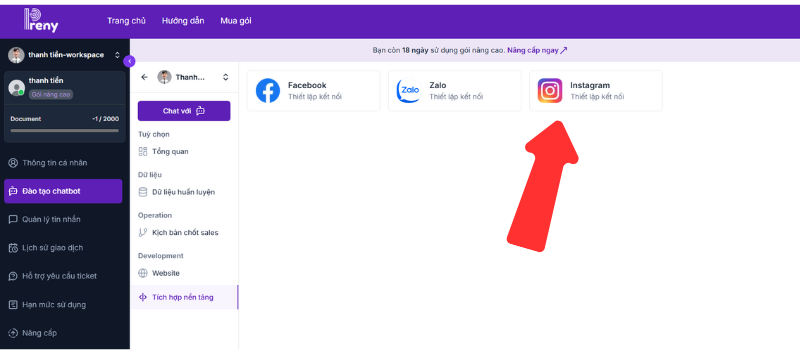
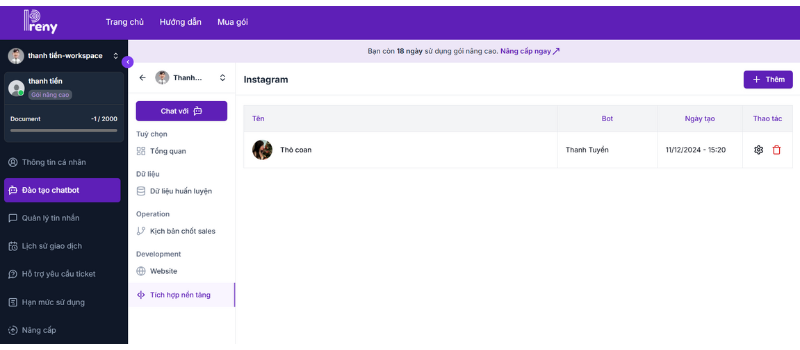
How to Create a Free Instagram Chatbot with Preny
To create an Instagram chatbot using Preny AI chatbot, follow the instructions below.
Step 1: In the Platform Integration section, select Instagram.
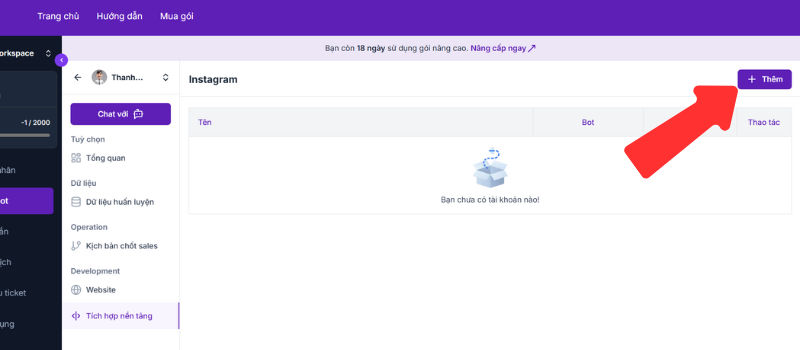
Step 2: Select the Add button to add a personal Instagram account.
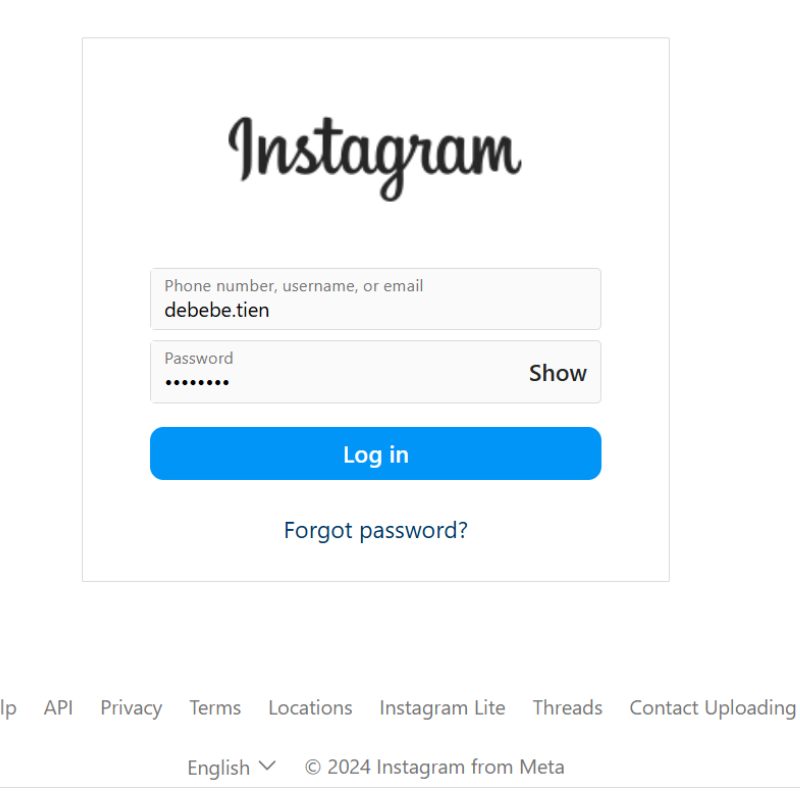
Step 3: Log in to the Instagram account you want to integrate the chatbot with.
Note: To integrate chatbot into Instagram, you need to convert your Insta page to a business or Sales account.
Step 4: After logging into Instagram, you perform the steps to grant permission to Preny.
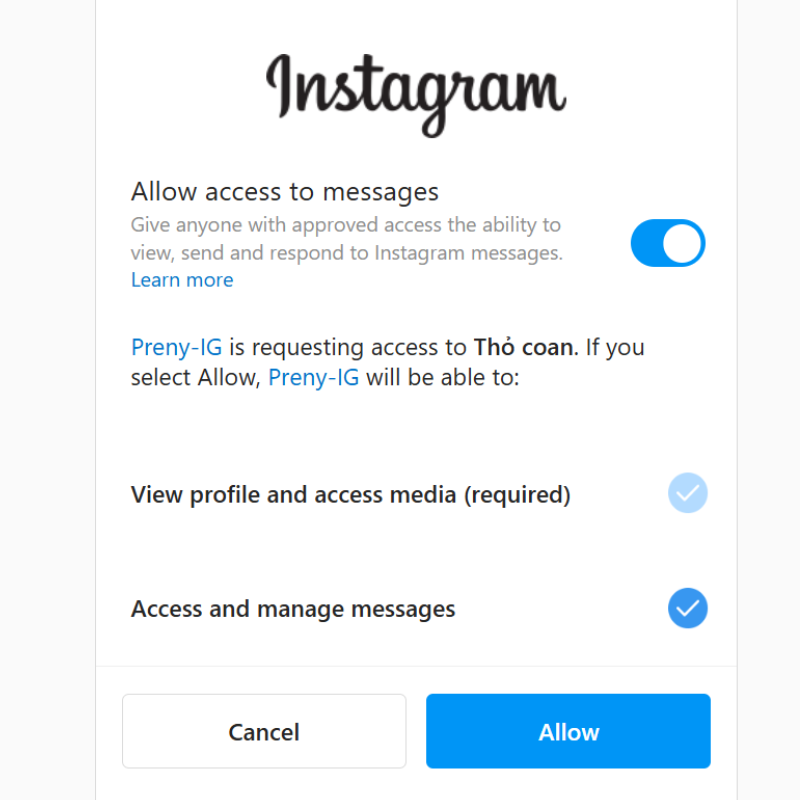
Step 5: You have successfully integrated AI chatbot Preny into your instagram.
Integrating AI chatbot into Lazada
You can now integrate chatbot into Lazada with the following simple steps:
Step 1: Select platform integration.
Step 2: Select Lazada platform.
Step 3: Select Login with Lazada.

Step 4: Link Preny to your Lazada account. In the site section, select Vietnam, enter your email and Lazada sales account password.
Step 5: Click submit and complete the integration of AI chatbot Preny into Lazada.

Bot Integration Does Not Respond
In case the customer installs the chatbot but lacks information: need to enable auto-reply
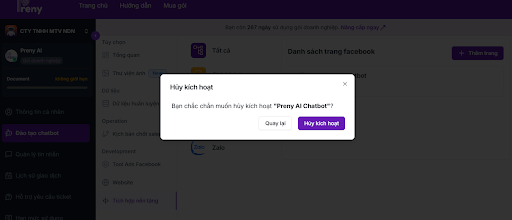
Try deactivating the page and integrating it again.
The page is conflicting with another application that needs to be removed for Chatbot to respond, then integrate another application to use in parallel.
Go to page settings to check if the page is connected to any application: https://www.facebook.com/settings/?tab=advanced_messaging
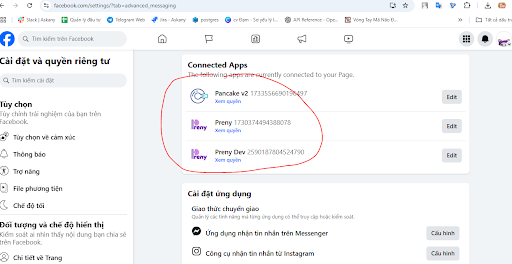
Here is showing connection with other parties in the Edit section of Pancake turn off 2 access sections and save

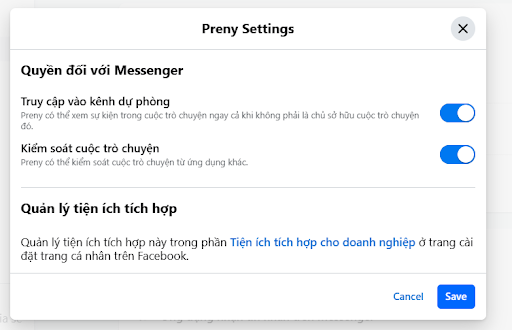
Go to settings with Preny turned on all access permissions:
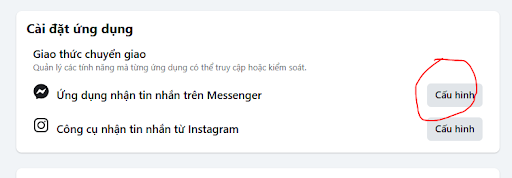
Scroll down to the Messenger Message Receiving App configuration settings and select Preny.

Switch to the Page's Facebook Admin account, go to settings: https://www.facebook.com/settings/?tab=business_tools
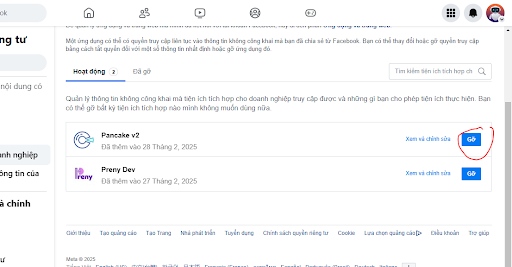
Uninstall other apps including Preny.
Log in to Preny, deactivate all Pages and click re-integrate.
Once the bot has answered, it can be integrated with another side for parallel use.
How to use and manage AI chatbot Preny
Once you have integrated the AI chatbot Preny into your platforms, here is how to use and manage your chatbot with each item in the admin section.
Message management
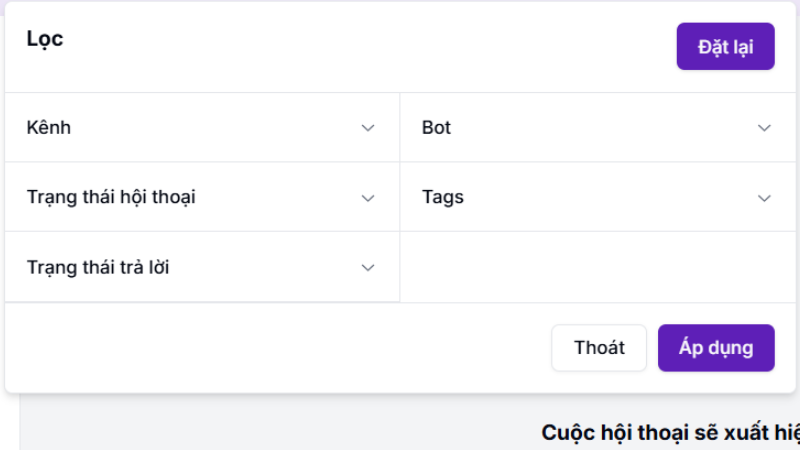
In this message management section, you will see all customer messages on the platforms you have integrated chatbot. To choose which platform to view messages on, click the Filter button. At the Filter button, 4 options will appear as shown below.

You can choose to show messages on all chat channels or specific channels. In each chat channel, you can filter out conversations with the following conditions: Channel, Conversation Status, Reply Status, Bot, Tags.
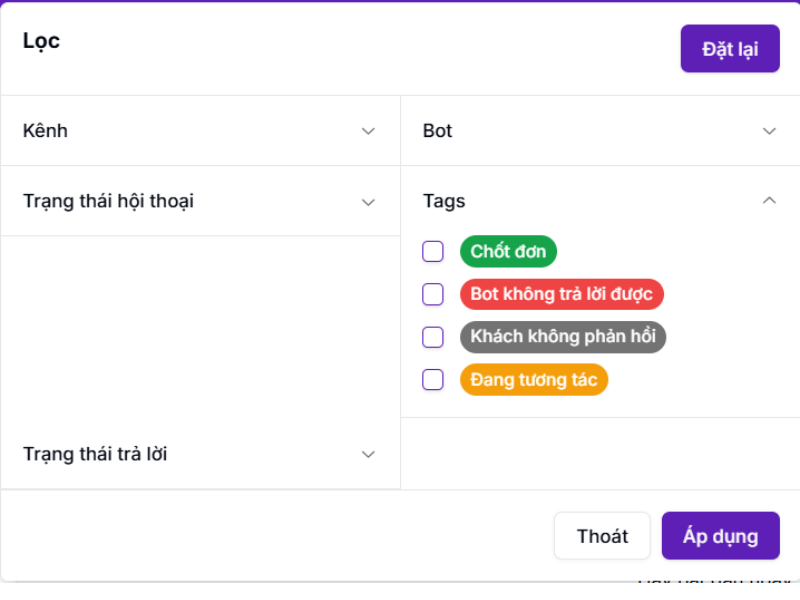
Tags include colors to classify conversations as follows:
Green: Chatbot has collected important information such as customer phone number.
Yellow: Chatbot and customer are interacting with each other and no human agent is involved.
Red: The chatbot cannot answer the customer's question and needs a consultant, the tag will turn red when the bot apologizes twice (but if LLM is enabled, the tag will not turn red), and you can only set it manually. Note: when the tag has turned red, but the customer continues to message, the bot will reply after 24 hours.
Gray: when the customer does not respond within 12 hours.
You can set tags for each customer yourself.
Facebook Ads Tool Installation Guide
Preny AI chatbot Facebook Ads Growth Tool has a feature to respond to customers directly on your Facebook ads. This will help you optimize the conversions from your advertising campaigns. This tool allows users to Opt-in message when clicking on your ads, so let's see how to set this feature up.
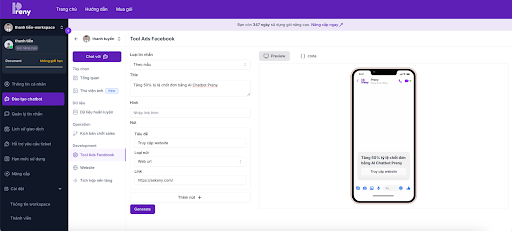
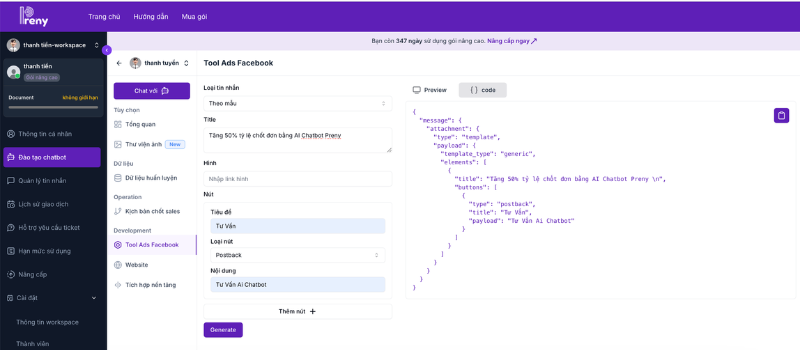
Step 1: On Preny's admin page, go to Facebook Ads Tool. In this section, you will set the default response for the chatbot.
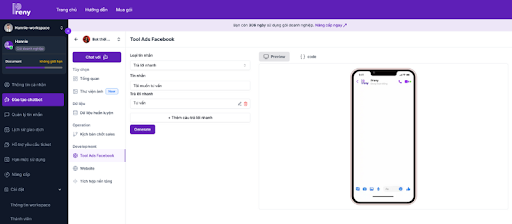
Step 2: Select the message type for the chatbot. In the message type section, there are 3 options:
- Often
- According to the sample
- Quick response
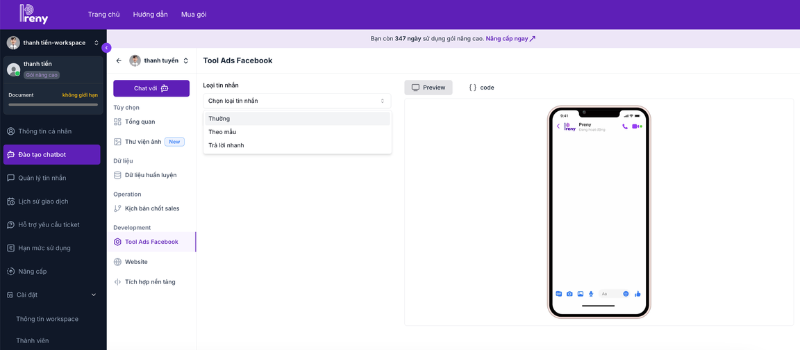
If you choose the Normal message type, this is the type of message that the chatbot will send first and wait for the customer to respond.

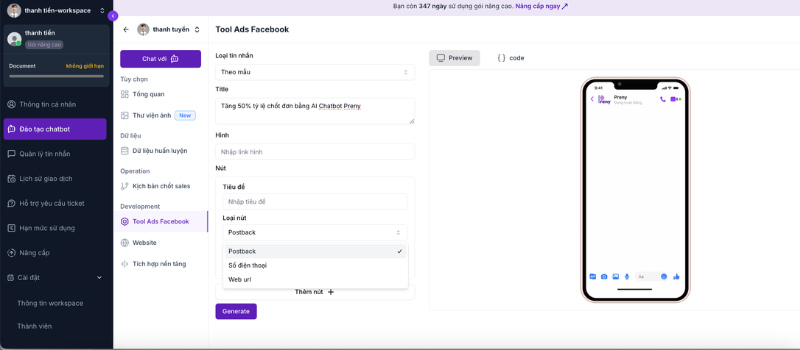
If you choose Template message, this is a type of message set up in the form of a pre-made question suggestion for customers in the form of a button. There are 3 main types of buttons:
- Postback.
- Phone number.
- Web URL.
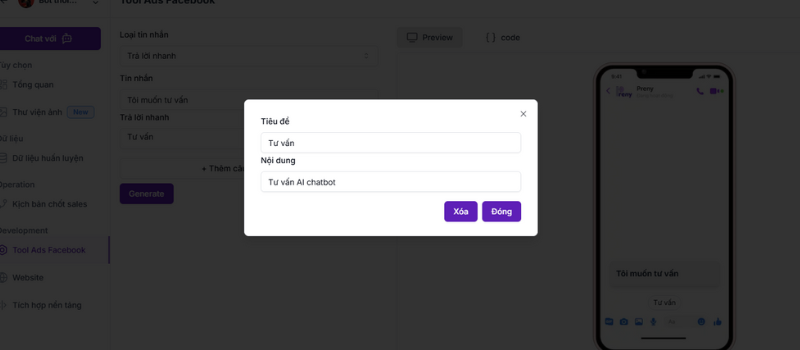
In the message section, Title is the content of the button such as: What do you want to consult, What product are you interested in,...
Postback: when the customer clicks the suggested question button (maximum 3 buttons), the chatbot will respond according to the trained content.
Titles are short questions for customers to choose from such as: "Consultation, quotation"
Content: is the content you want the bot to answer customers but must be based on the data you have trained the chatbot.
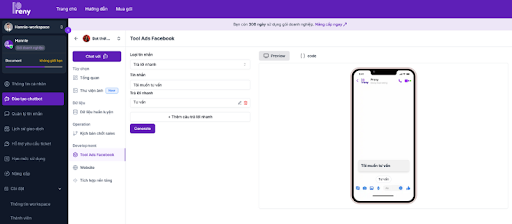
Once set up, click Generate to see a preview of your message template.
Phone number: when the customer clicks the button, it will switch to the call section for the phone number you set up. In the title, you will enter content such as: Call now, Call for quote,...

Web URL: when customers click the button, they will be redirected to the website you provide in the Facebook Ads Tool section. For the title, you will enter content such as Visit website, Refer to product, etc.
If you choose Quick Reply it is the same as the Postback button but you get up to 13 Suggested Questions buttons.

Step 3: After setting up the message type, you will click on the Code button and save this Code to attach to your ad template.
Step 4: In Facebook Ads Manager, select the ad template you want, in the message template section, select Advanced settings and select Edit template.
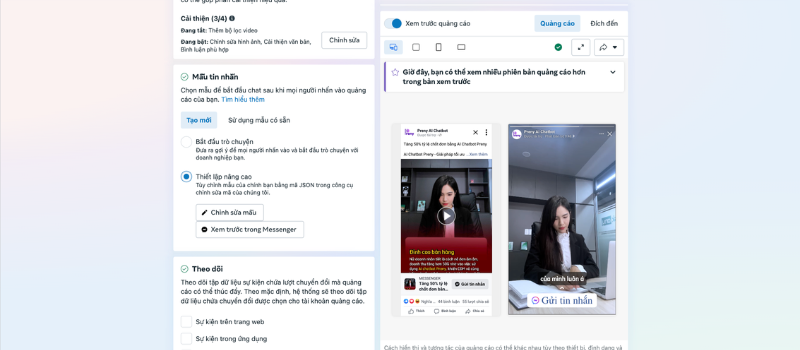
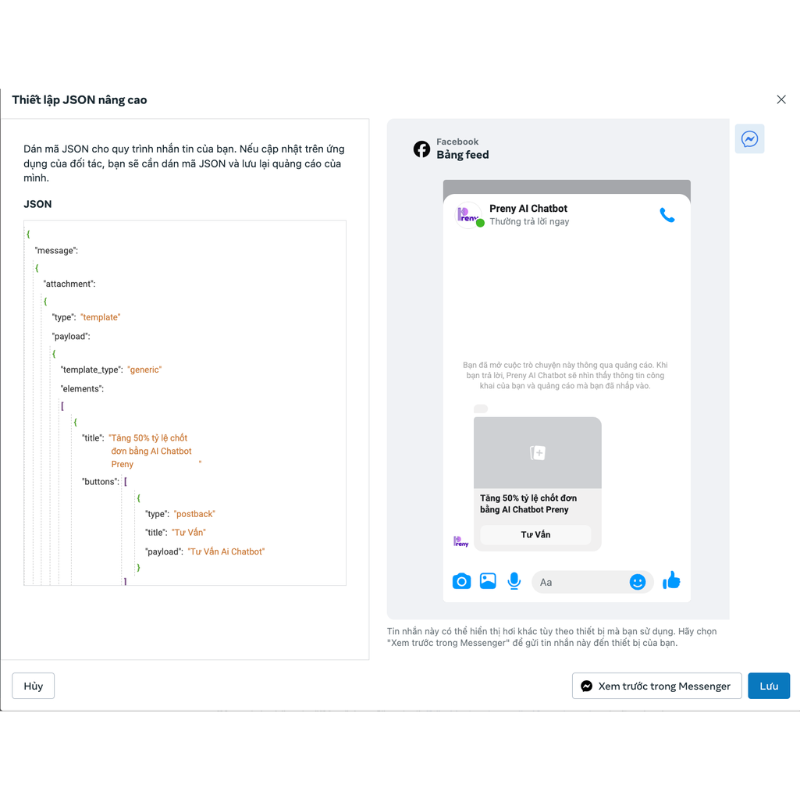
Step 5: Paste the code of AI chatbot Preny into the JSON box. View Preview on the right and click Save.
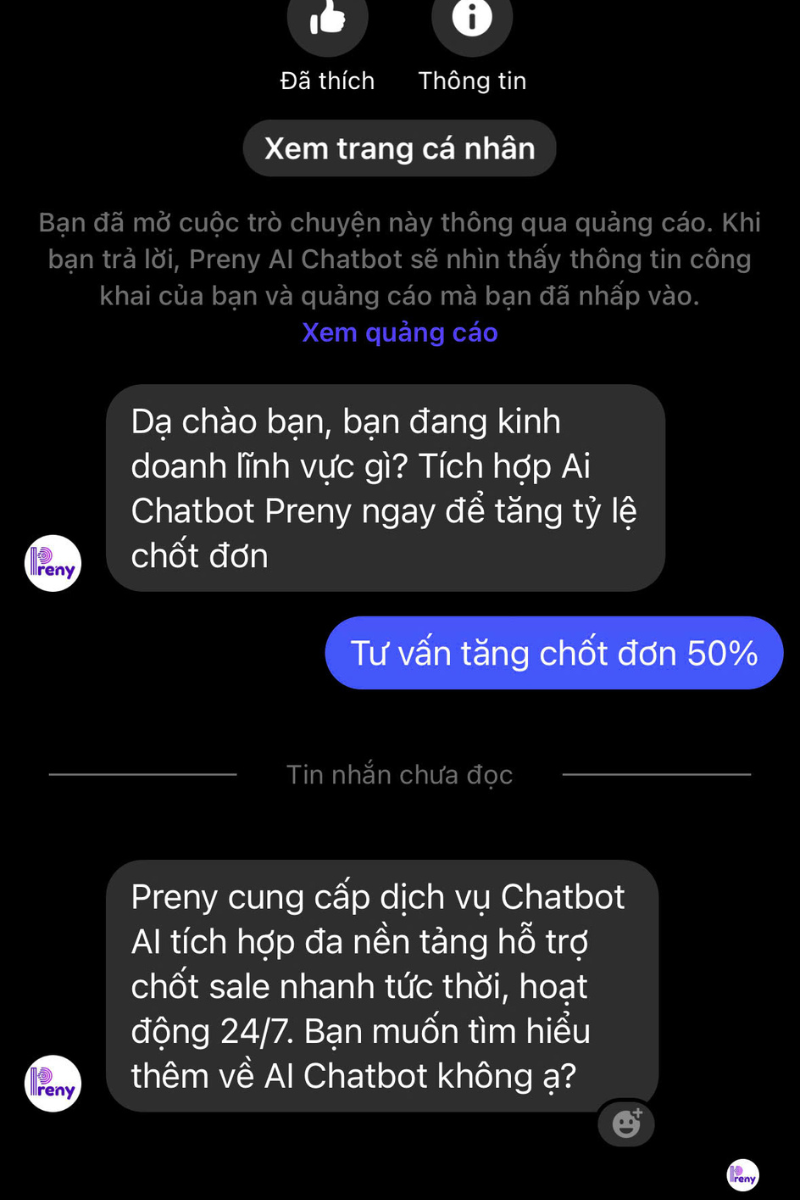
This is an ad template that has been set up with Preny's Facebook ads tool.
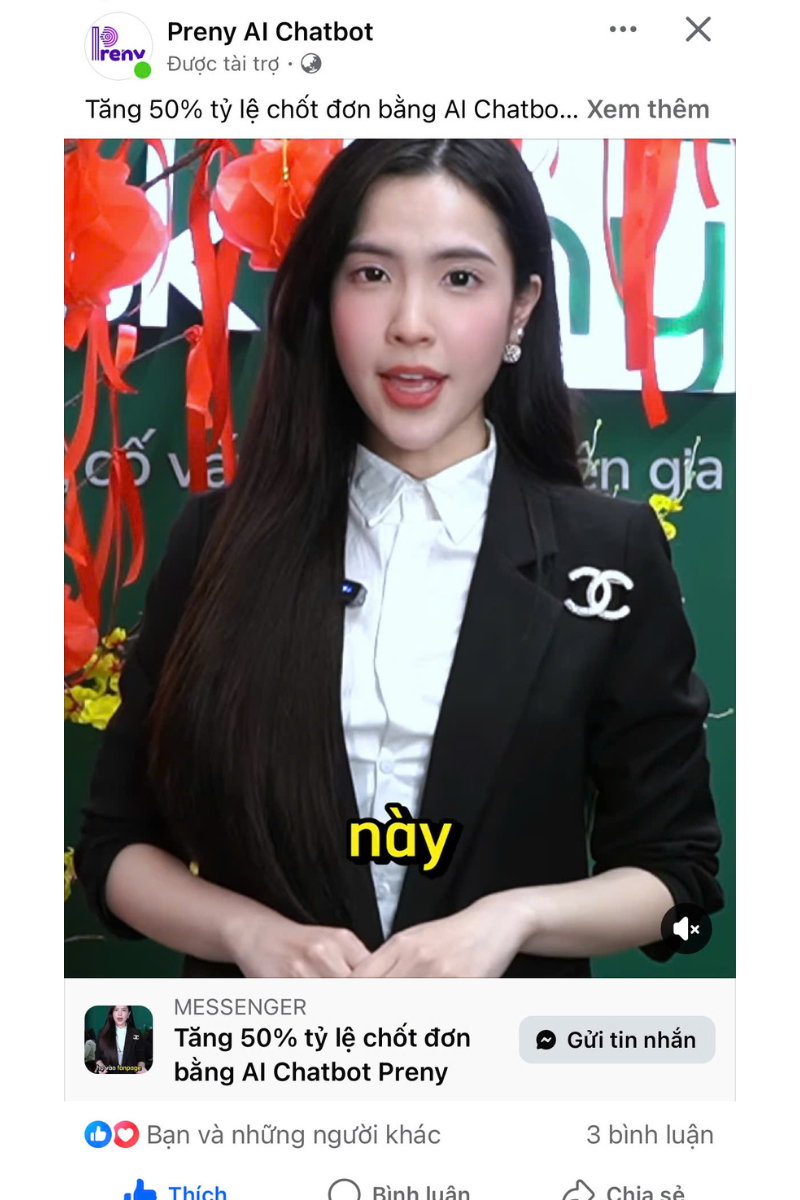
When the customer clicks the Send Message button, the instant message you have set up will appear.

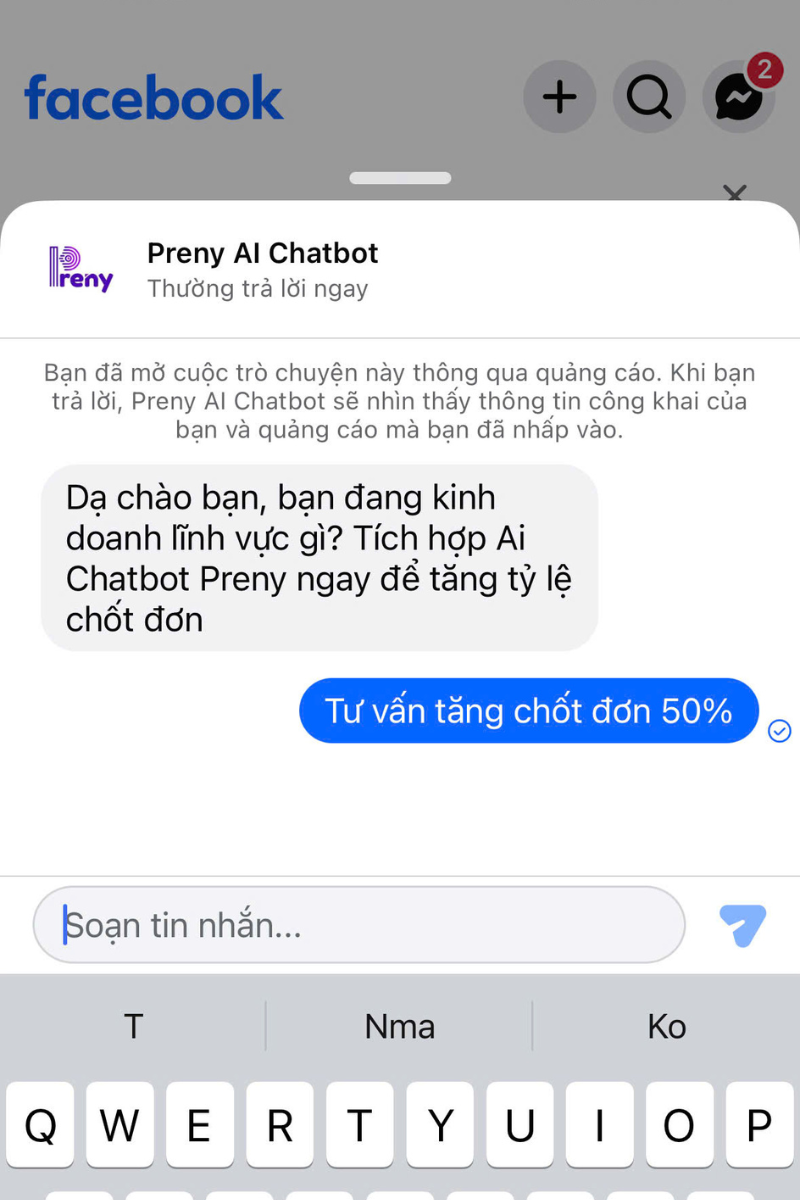
Customers click on the Consult button to increase closing rate by 50% and the AI chatbot will advise customers according to the scenario you have trained.
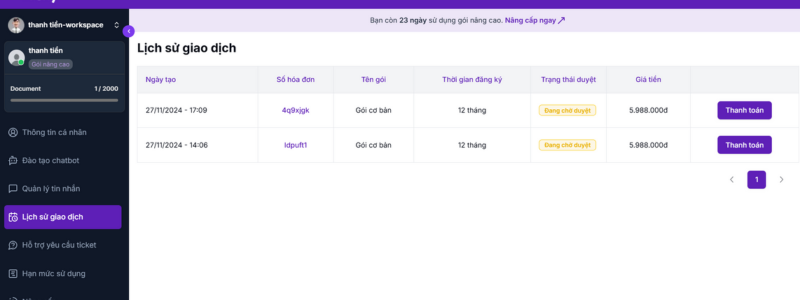
Transaction History
In the transaction history section, you will see the information when you register for the AI Preny chatbot service package. If you have not paid yet, the status will be Pending approval, and if the payment is successful, it will show Approved.
Support ticket request
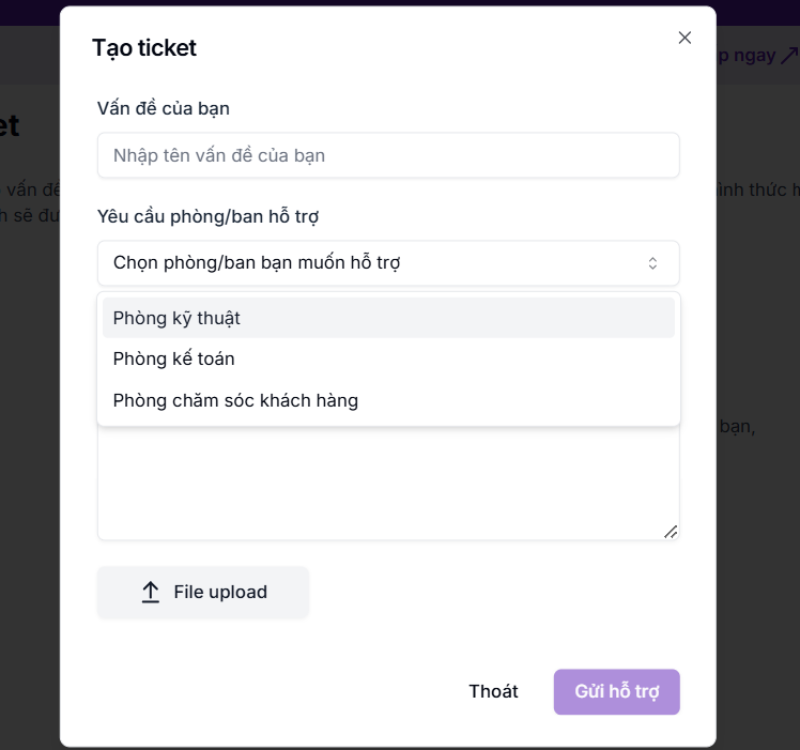
In this ticket request support section, if you have any problems while using the chatbot that cannot be resolved, please send a request to the support admin team. Click the Create new request button.
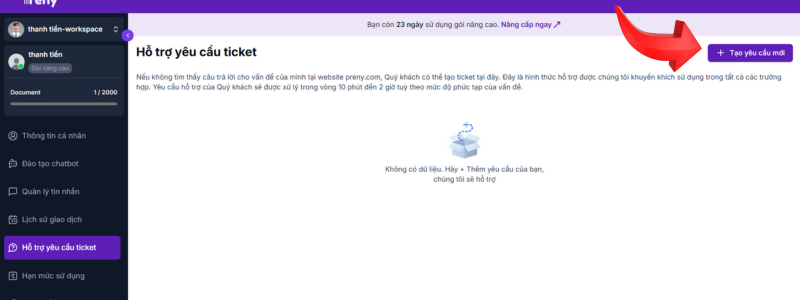
Create a ticket about your problem and select the department you want to contact for support. The admin team will contact you immediately by phone to take care from AZ. This is the difference between Preny and other chatbots today because there is a 1-1 24/7 admin support team.
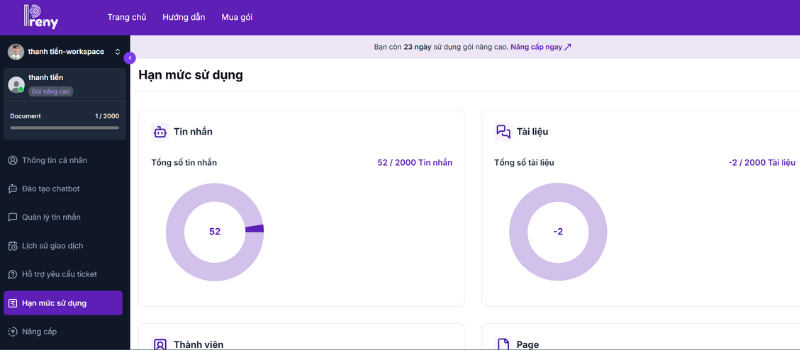
Usage limit
In the usage limit section, you will see the limits of the chatbot service package you are using.
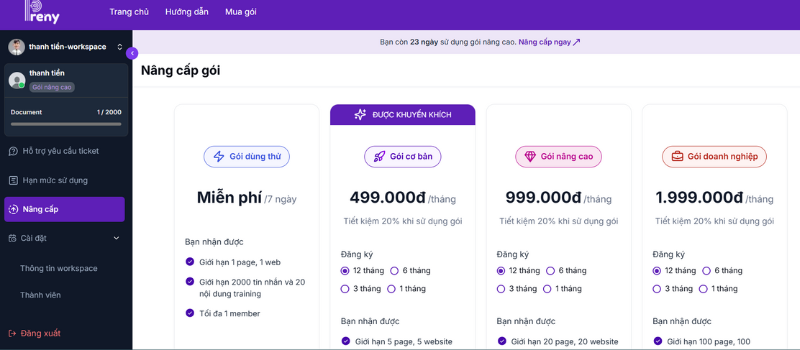
Upgrade
If you want to upgrade your service, you can choose from the chatbot service packages we offer.
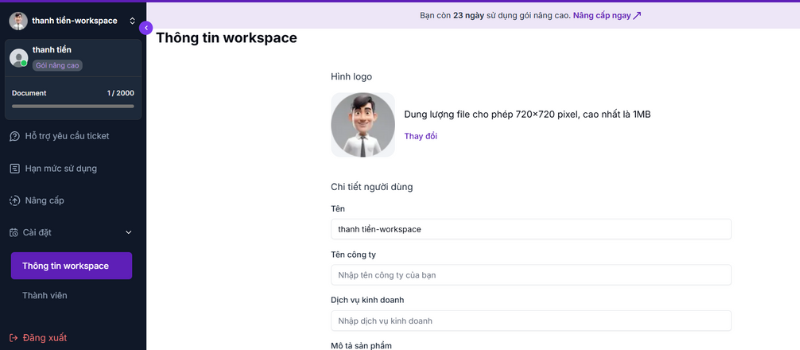
Account administration rights
In the Workspace Information section, this is information about the chatbot Account Owner's company and business field.
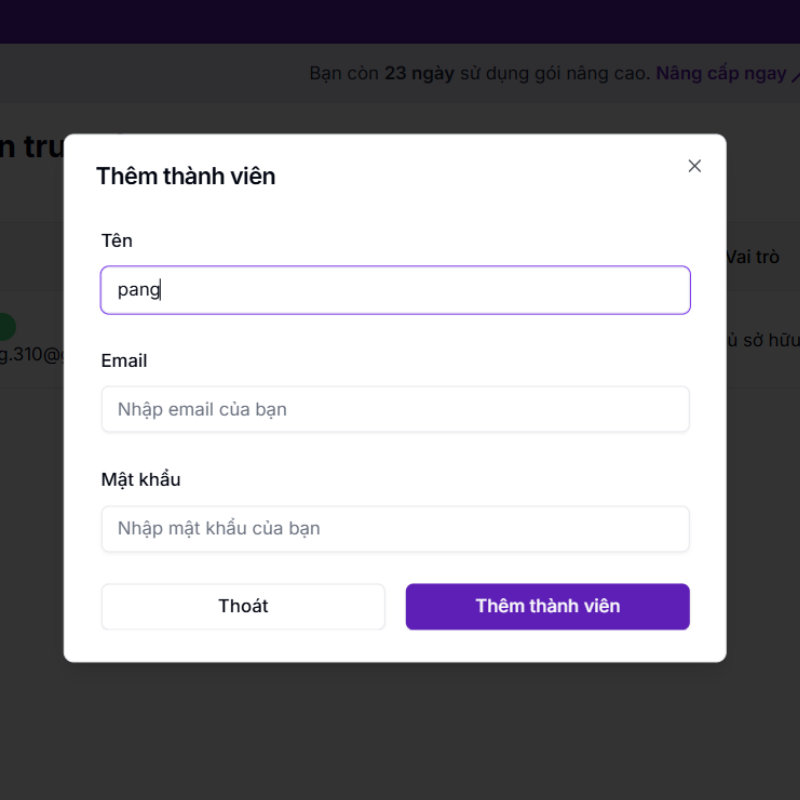
The chatbot account owner will have the ability to add new members to their Workspace by clicking the Add Member button.
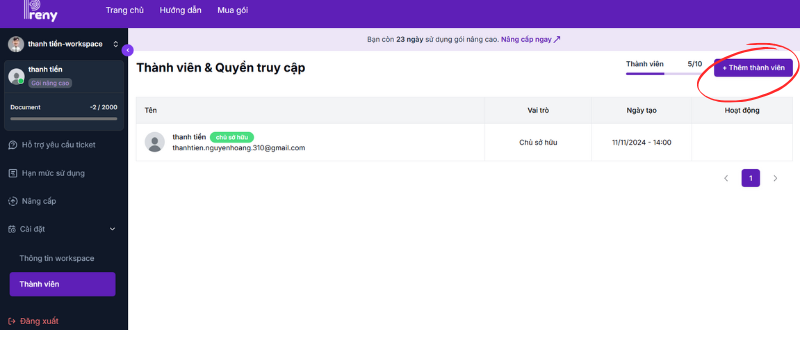
Add Preny account Name, Email and password information to add new member.
Above is how to create a Facebook fanpage chatbot, create a chatbot for Zalo and website extremely simply using AI Preny chatbot
Instructions to remove chatbot from fanpage
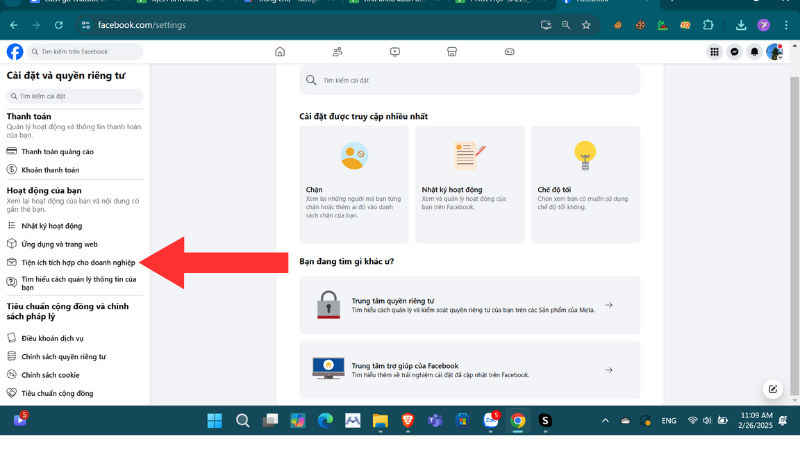
Step 1: Visit the fish facebook page As the admin of the fanpage you are integrating the chatbot with, select Settings and privacy in the right corner.
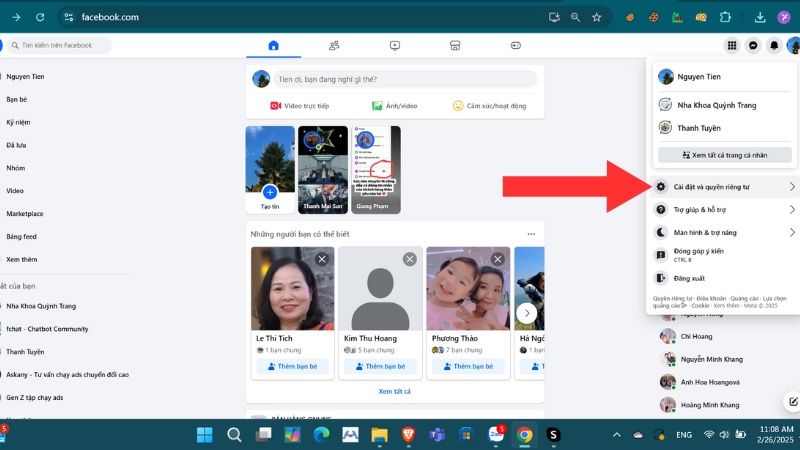
Then select Settings.
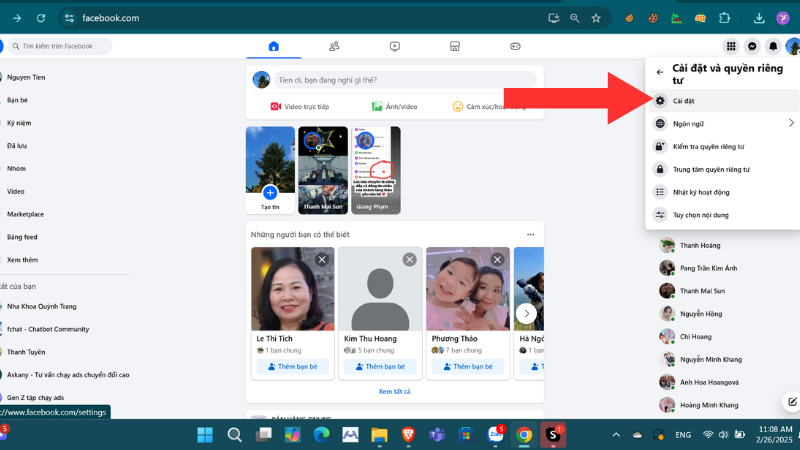
Step 2: In the Settings section, select Business Integrations.
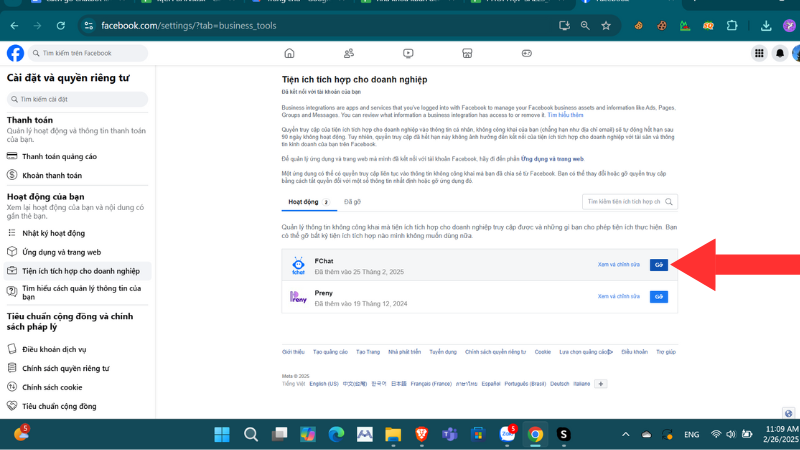
Step 3: Select chatbot software, select the remove button.
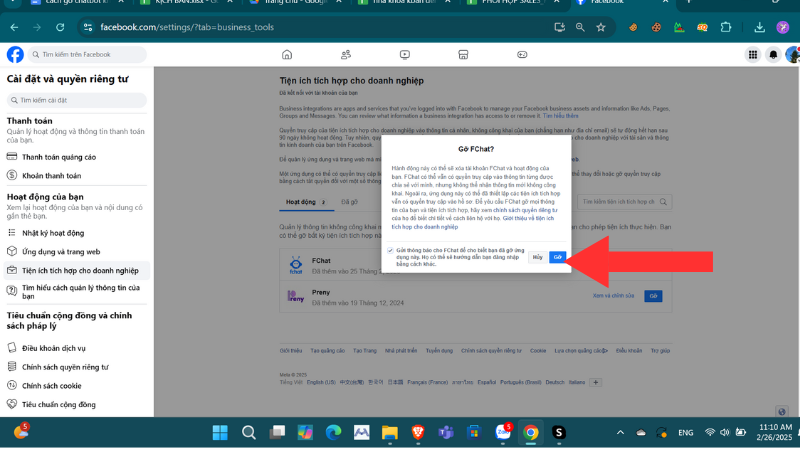
Step 4: Click the remove button and you can use AI chatbot Preny.
Guide to Sending Marketing Messages to Customers via Email/Phone Number Lists with Preny
Introduction
With Preny, you can now easily send Marketing Message campaigns to all customers uploaded from an Email or Phone Number file. This new feature helps your brand deliver information quickly, consistently, and professionally — boosting reach efficiency and increasing conversion rates.
Below is the step-by-step guide:
1. Log in and connect your advertising account
Step 1: Log in to Preny
Go to preny.ai → log in to your account.
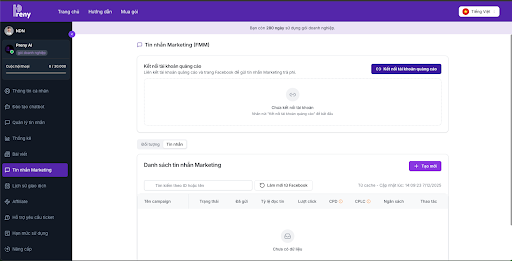
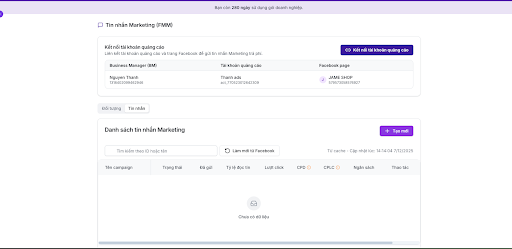
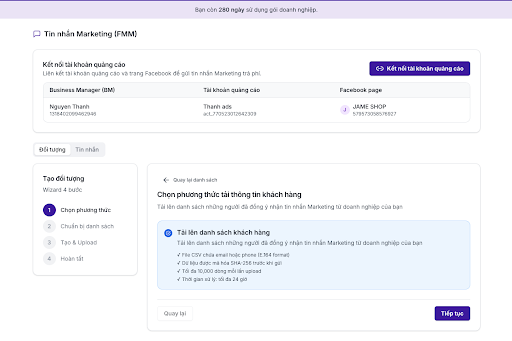
Step 2: Access the Marketing Messages feature
In the left-side menu, select Marketing Messages.
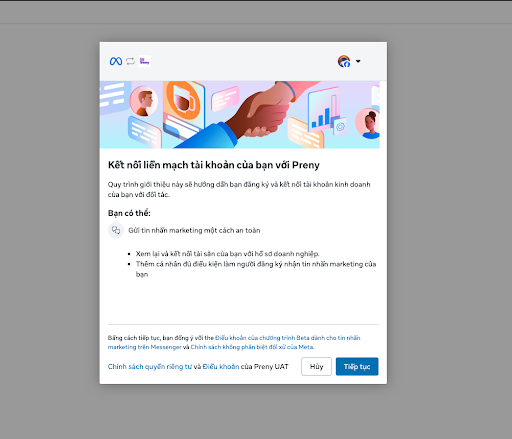
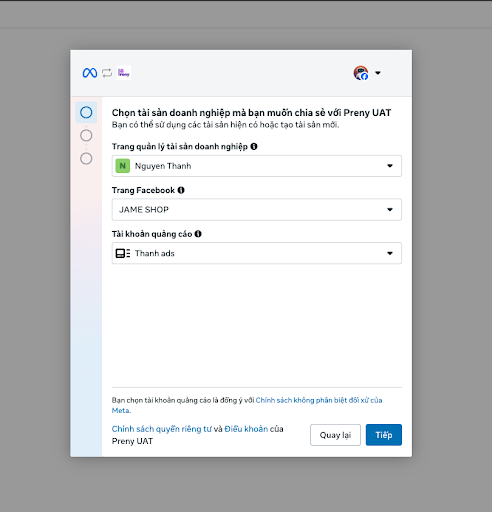
Step 3: Connect Preny with your Meta account
To enable Preny to send marketing messages, you need to grant permissions for:
- Business Manager — e.g., Nguyen Thanh
- Fanpage — e.g., Marketing messages
- Ad account — e.g., Thanh ads
Preny will display all required permissions. Make sure to include Marketing Messages and other necessary messaging permissions.
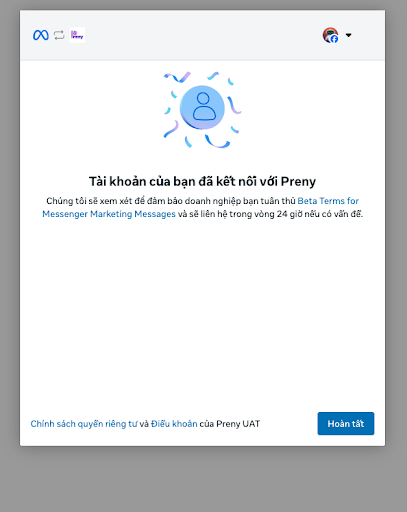
After granting permissions, the system will automatically connect and save your configuration.
2. Upload the customer file
Step 1: Prepare your data file
Preny provides a sample file containing Email or Phone Number so you can enter customer data in the correct CSV format.
You can download the sample file here: FMM PRENY
Note: Phone numbers must be in the correct format, for example 84387533099
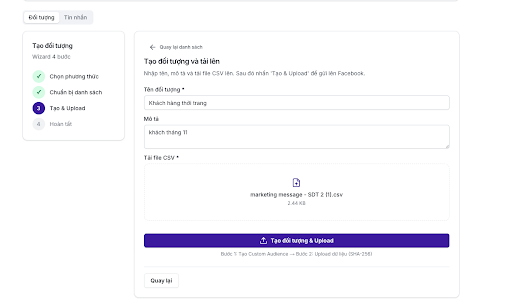
Step 2: Upload the file
Upload your file to create a customer audience. Preny will automatically send the data to Meta.
Click “Create audience” and follow the instructions.
Enter the required information: Audience name, optional description, upload the CSV file, then submit.
After completion, the screen will display how many rows were received and how many entries were invalid.
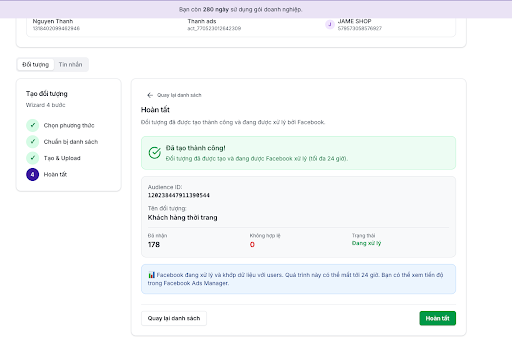
Step 3: Wait for Meta to process the data
Facebook will match the uploaded Email or Phone Numbers with real users. Processing may take up to 24 hours.
Once matched, Meta will show how many customers can receive messages. Example: Successfully matched 243 users.
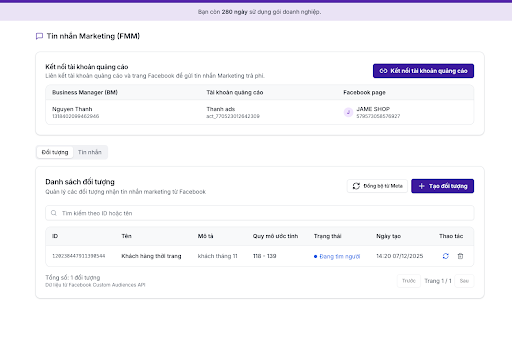
Tip: After uploading, wait 15 minutes and then click “Sync from Meta”.
Step 4: Sync user tokens from the uploaded Audience
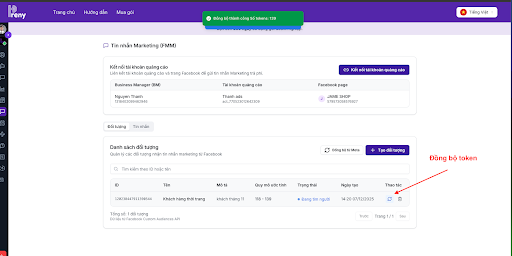
You will receive a notification showing how many tokens were synced. Then proceed to create a messaging campaign.
3. Create a Marketing Message campaign
Step 1: Initialize the campaign
In Marketing Messages, select Create campaign and configure:
- Campaign name
- Budget: select a budget appropriate for your customer volume.
- Campaign name
- Budget: choose a sending budget suitable for your customer list.
- Message recipients (the audience you just uploaded)
Recipients (the audience you uploaded)
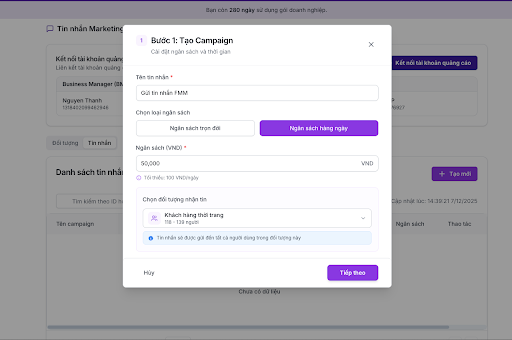
Click Continue to proceed to the message setup step.
4. Create the Marketing Message content
In the content setup step, you can:
- Add an image URL copied from Preny Media Library
- Enter the title
- Enter the message body
- Add a CTA button URL (optional)
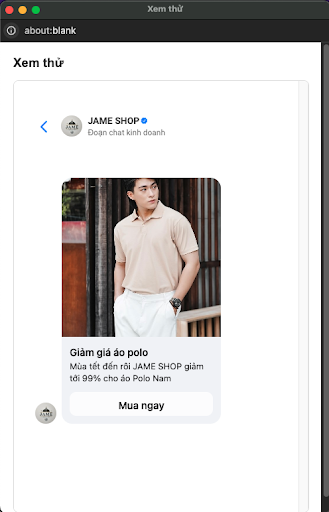
Preview the message before sending

Preny provides a real-time preview in the Messenger format, ensuring your message is clear and engaging.
After completing the content, click Continue to proceed to the review step.
5. Review & Send the campaign
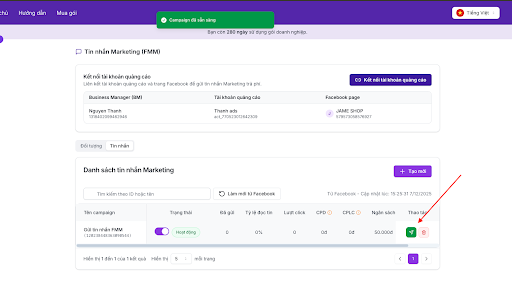
After creating the campaign, return to the list and wait for Meta to approve the ad (about 15 minutes). Once everything is ready:
You can check whether the campaign is ready to send by clicking the check button.
→ Click Send campaign once it is ready
The system will begin sending messages according to your defined budget.
Note: during sending, do not click the “Refresh from Facebook” button until all messages are sent.
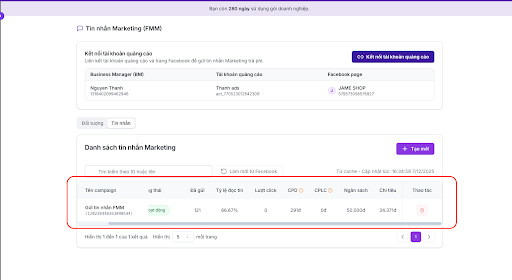
6. Track customer responses
After your messages are sent:
- If a customer replies → Their message will appear in the chat inbox on Preny.
This helps you easily manage conversations, provide instant customer support, and measure campaign performance.
The campaign will be marked as Completed when all messages have been delivered.
Monitor campaign statistics to evaluate effectiveness.
Wishing you success in optimizing your Marketing performance and engaging customers better with Preny!